Are they getting straighter?

MICHAEL

Elite Cafe Member
Joined
Dec 14, 2009
Messages
339
Location
Harriman, Tn.
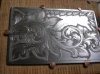
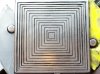
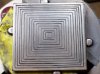
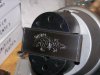
I have worked on nothing but straight lines for the last week everyday. Cut about 15 plates, front and back like this one. I think I'm seeing improvement with each plate. I try to cut as straight a line as possible then recut the lines where depth and width vary, or where the line is not straight. I started to make the lines worse, so I stopped. I'm finally starting to get some of the 90 degree corners cut without overruns. Any tips or instruction on getting the lines straighter is welcomed, also in getting crisp corners. I know I have many years of work ahead of me and many more lines to practice. I just wanted to show everyone that I am trying very hard and putting in the hours cutting. I appreciate everyone's help!:)
 

Attachments

  • 100_0205.jpg
    100_0205.jpg
    89.8 KB · Views: 207

Jane

Elite Cafe Member
Joined
Oct 9, 2009
Messages
346
Location
NW Texas
I can see improvement.....as a beginner myself I understand all those hours of hard work....but they do pay off. Keep cutting!!!!
 

dhall

:::Pledge Member:::
::::Pledge Member::::
Joined
Jan 1, 2008
Messages
144
Location
San Diego, California
Hi Michael,

It's coming along, and that's what paying your dues does for you! You've probably seen them, but Sam has two tips at the bottom of the cover page when you log on to www.igraver.com (before you enter the forum), "Intersecting Lines" and "Cutting Straight Lines". If you haven't seen them, check them out, they might be just what you're looking for.

Best regards,
Doug
 

Marrinan

~ Elite 1000 Member ~
Joined
Nov 11, 2006
Messages
2,917
Location
outside Albany in SW GA
Michael, Your doing very well. I would suggest that you back off on the depth for now. work on shallower lines first. Lynton McKenzie said these are what he sweated most. I generally cut a bunch of lines before I start engraving for the day. I admire your enthusiasm. So many beginning engravers cut a few lines, curves, and scrolls and want to cut knives and guns way before the control is there. Keep trying, stay to the side of your scribe line, maintain your angle of approach, don't cut quit so deep on a single pass-Fred
 

monk

Moderator
Staff member
::::Pledge Member::::
Joined
Feb 11, 2007
Messages
10,868
Location
washington, pa
that's got to be so boring, it will drive you nuts. break up the monotony, alternate with some curves. not only would this make me nuts, it might make me half blind in the process. or make a partial straight, then let it drift into a curve. let your work become a bit more dynamic, less static and ridgid. have some ffun while you practice.
 

Tira

~ Elite 1000 Member ~
Joined
Nov 9, 2006
Messages
1,551
Location
Doylestown, PA
Hello Michael! You are improving. It may seem slow now, but keep up the focused work and it will pay off.

What type of heel are you using for the straight lines? The traditional heel will be easier to control for straight lines especially over a distance. The "V" heel is harder to control in a straight fashion (although you can do it as well - it's just trickier). I see you have some burrs in the lower left corner where the lines intersect. Go in and see if you can finesse them out. It may take a couple of back and fourths where you cut in one direction - then cut into the corner from the other direction - to get these to neatly meet. It may seem like a small detail, but back cutting and neat intersections are important in the long run with engraving. Keep cutting and good luck. :)
 

KSnyder

Elite Cafe Member
Joined
Nov 13, 2006
Messages
613
Location
Toledo, Ohio
Michael, take good look at your plate. one way it looks like you could fall in the shaft the other way it looks like a pyramid. As for my $.02, straight lines are the hardest to cut. I use alot of them because of my work with flint rifles.
And like Tira said, don't worry too much about the depth but keeping the depth of cut uniform.
 

fegarex

~ Elite 1000 Member ~
Joined
Nov 8, 2006
Messages
2,061
Location
Ludington, MI
Michael,
Like all the others have said. Straight lines are the hardest. Everyone can tell if a straight line is bad where they may not notice a mistake in a scroll. I think you are doing well and just more "chips on the floor" will help. As far as the corners, you need to back cut them possibly a couple times until you get a nice square corner. Also, the practice plates you are using are not the world's best for making clean end cuts. The plates are "gummy" and popping the chip at the end is difficult. You'll find cutting some other metal may be easier. Still the plates offer a good medium for practice.
Rex
 

KSnyder

Elite Cafe Member
Joined
Nov 13, 2006
Messages
613
Location
Toledo, Ohio
I like the steel plates/sheet I get from muzzleloaderbuilderssupply.com. the have 1009 mild steel 1/16" thick in 4x6" sheets. it cuts wonderful & finishes nicely for belt buckles or whatever. Cut it up with a hacksaw & go to work. buckle shown is the above steel.
 

Attachments

  • DSCN0524.jpg
    DSCN0524.jpg
    91.9 KB · Views: 105

KCSteve

~ Elite 1000 Member ~
Joined
Jun 19, 2007
Messages
2,882
Location
Kansas City, MO
One tip from last year's Engrave-In:

I can NOT remember his name enough to spell it properly but the gentleman from Russia who does a lot of coin dies did a demo and I loved his trick for really clean corners - he uses a punch! Just taps it in on each corner and then cuts his lines to the punched hole.

I just start from a little way out and cut to one corner, then turn around and extend the line to the other end, but someday I'll get around to making some punches.
 

Christian DeCamillis

Elite Cafe Member
Joined
Nov 9, 2006
Messages
639
Location
Traverse City, Michigan
Steve, That is a great idea. I never would have thought do punch in the corner. I would think that if you use burs already. You could also drill in slightly with a round burr the appropriate size, and cut to it. These are the kind of tips that are so great because it will now get me thinking in another direction. Chris
 

John B.

Lifetime Pledge Member
::::Pledge Member::::
Joined
Nov 9, 2006
Messages
3,955
Location
Los Angeles area, California.
KCSteve,
I believe the gentleman from Russia you are refering to is Amayak Stepanyan.
A great guy and a wonderful engraver/artist.
Enjoy Atlanta and Engrave-in and my best to you, your wife and my friend Amayak.
 

MICHAEL

Elite Cafe Member
Joined
Dec 14, 2009
Messages
339
Location
Harriman, Tn.
I appreciate all the responses.
Dhall, your advice was very valuable to me. I missed the intersecting line tutorial somehow. I think that was my main problem in kicking up burrs and damaging my corners. again thanks!
Fred -Thx, but the first guns I engrave will be my own and a very good friends, who helps me with gunsmithing / machinist work. I tried other plates today and the shallow cuts are harder to execute. I appreciate your input.
Monk- Thx for the advice but it's not boring at all. This is the framework that I will someday display my engraving that I will be so proud of. My plan is first straight lines, then circles/ curves, scrolls, then maintain these and engrave the multitude of cylinders, barrrels, and recievers given to me by my gunsmith friend to prepare me for my first firearm (most likely a set of pietta 1858 remington cap and ball pistols). Appreciate the response.
KSnyder- Thx, will do!
Rex- Thx for the feedback!
Steve- I modified a round punch on my beltgrinder and tried it. I had it down to a needle point and it displaced metal and didnt look good after I intersected the lines. I wonder if I had made it a square punch would it have worked better? From my carpentry experience I thought this would work great. Any more idea's on this will be welcome. You did help me alot by suggesting cutting the corners first then connecting the lines. MY other attempts today came out better faster! Thx again.
Cris- If that burr idea of yours works, please let everyone know. I've been wantin' one them thar rotary tools fer texturing my woodcarvin'! Thx as always for the post.
John B- Thx for the explanation concerning "too many cooks spoil the broth". Being new to the forum, I'm still learning proper forum edicate. It would be great if Marcus's thread on his thoughts was made a sticky and if it included more on proper forum edicate for us new guys. I was unsure if I should start a new thread and asked in my last post on my thread concerning tool geometry if I should start a new thread since I changed the subject to cutting straight lines. Nobody answered, so I started a new thread. Us new guys know so little that we aren't even sure on how to ask a question / more than likely the question we ask is not the real question we should be asking. Just for future reference, should I post my progress with my straight line cutting on this thread from now on? I mean only when I see major improvement, need more help, or asking if I should move on to circles. Thx for the help and encouragment. Much appreciated!
Tira- I saved the best for last!:) I'm using a carbide square graver, 60 degree face, 20 degree heel. Sharpened on 600, 1200, and polished on a ceramic wheel with diamond spray (1/2 micron). I have 3 square gravers with face angles 45, 50, and 60 / heels from 15-20. I can cut with any of them, as I cut with a different one every now and then, to see, is it the graver cutting better or am I just learning to control the graver better. I think i'm just getting better at controlling the graver. I like the clearance of the graver I'm using most at present and it feels the most comfortable cutting. The 45 degree face graver sometimes plunges into the metal, even if I lengthen the heel, so I don't like it very much. I'm still experimenting with spm and I am currently cutting at 2800 spm. I included an updated pic of the plate at the beginning of this thread (2nd pic). The first pic is the original. I followed your advice and did my best to clean up the corners and recut some lines after a good 4 hrs sleep. I know, I need more sleep. I will try to turn in earlier tonight. That darn job keeps getting in the way of my cutting. Thanks for all your help.:banana:
I will monitor this thread for advice but will only post pic's again after many, many, hours of cutting. Thanks again everyone!
 

Attachments

  • 100_0205.jpg
    100_0205.jpg
    89.8 KB · Views: 47
  • 100_0207.jpg
    100_0207.jpg
    83.1 KB · Views: 51
Last edited:

KCSteve

~ Elite 1000 Member ~
Joined
Jun 19, 2007
Messages
2,882
Location
Kansas City, MO
KCSteve,
I believe the gentleman from Russia you are refering to is Amayak Stepanyan.
A great guy and a wonderful engraver/artist.
Enjoy Atlanta and Engrave-in and my best to you, your wife and my friend Amayak.

YES! :yes

That's the man!

Now we just need to get him to tell us how he gets it to make a nice, clean divot instead of displaced metal.
 

Marrinan

~ Elite 1000 Member ~
Joined
Nov 11, 2006
Messages
2,917
Location
outside Albany in SW GA
Michael, Probably, in my humble opinion, it the thick/thin border. A hair line with a wider line running next to it. When you have lines running side by side as on your practice plate I think the eyes sometimes lead to trying to keep them equal. You might try changing line width on alternating lines to get used to watching only the line your working on. another suggestion might be to work shorter lines and increasing length as you perfect one length.
 

j.c.

Member
Joined
Nov 9, 2006
Messages
52
As much as the term “square†graver is somewhat of a misnomer…may be appropriate here…

“square†graver...tilt up…push down… where lines intersect…

= “square†corners.

j.c.
 

John B.

Lifetime Pledge Member
::::Pledge Member::::
Joined
Nov 9, 2006
Messages
3,955
Location
Los Angeles area, California.
Michael,
Thank you for your reply.
I think you are doing GREAT with your work progress and your response to any help offered to you.
My too many cooks remark was to point out that you were getting good help from Marcus, Tira, Arnaud, Steve and others and didn't want to see you distracted from that.
As Rex would say......keep those chips hitting the floor.
Enjoy the journey and I look forward to meeting you at FEGA during your Masters application.
Best.
 
Last edited:

richard hall

Elite Cafe Member
Joined
Jan 21, 2008
Messages
448
Location
kensington,ohio
Michael, glad you posted such a thread on borders, made me realize that up to this point I havent cut a border since 1977, so I dug out an old practice plate,darkened it up with a black magic marker, used a set of dividers, and cut with hammer and chisel...Sure need alot of light to see where that chip is going !!!!!!!! Then; you have to walk away from it for a spell and come back so your eyes arent all blurred up......
 

Attachments

  • cutting a border 2.jpg
    cutting a border 2.jpg
    54.3 KB · Views: 43

MICHAEL

Elite Cafe Member
Joined
Dec 14, 2009
Messages
339
Location
Harriman, Tn.
Thanks to everyone for the instruction and encouragement. I've been on call the last 3 days and didn't get called in once, so I cut lines the entire time (about 40 hrs). I must be getting better because I was cutting all day with a graver that was missing a tip (probably broke of from flicking burrs off the corners that were not ready to go) and was improving. I finally realized this and resharpened. Man did that make a difference. I bumped my spm up to 3600-3800 spm. Seems to cut a smoother line. I've been working the corners like Tira said (cutting the burr out now instead of prying it out) and not trying to cut the line in a single pass. I'm holding the tool lightly and letting it do the work like Rex said (focusing on this helped alot).
J.C.- I was unsure of what you wrote when I read your post earlier but I think I understand now. I work a 16 hr shift tomorrow but wil try what you said when I get home (wife won't go to sleep till late, so I should get to cut an hour or two). Well, got to get to bed. Thanks again to everyone for your help!:tiphat:
 

Latest posts

Sponsors

Top