KatherinePlumer
Elite Cafe Member
I told Mary W I would post these (a while ago, sorry!) so here goes, maybe it'll be of some use to others as well. Being still very much a newbie in the scrim world, I have a whopping *TWO* tools right now.. I'm sure over time I'll acquire more, but so far I really haven't felt the need, other than when I was doing the background of that wolf I was really wishing I had some fancy air thing that would do all the work me, lol.
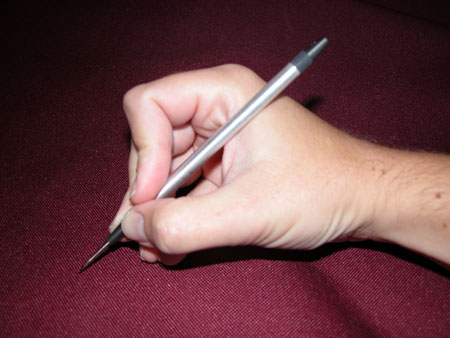
These aren't the greatest pics, left handed photography is not my speciality... And yes I have been told I hold a pencil strangely...
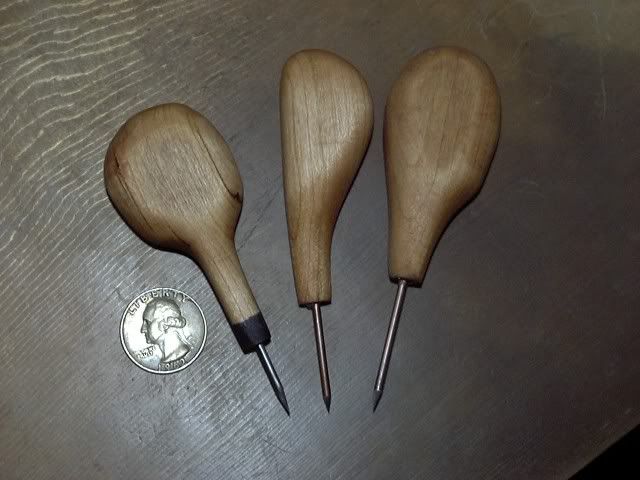
It started with this one, a double ended pin vise from Graphic Chemical. It came with two tips, one steel and one carbide. I like the carbide one better but I really can't explain why, I just do. The one in the pic is the steel tip though. The first couple pieces I did were all using this tool, and I quickly realized I needed to make some changes. It's narrower than a pencil, and gripping this skinny little thing for extended periods of time was giving me some pretty funky hand and wrist pain.
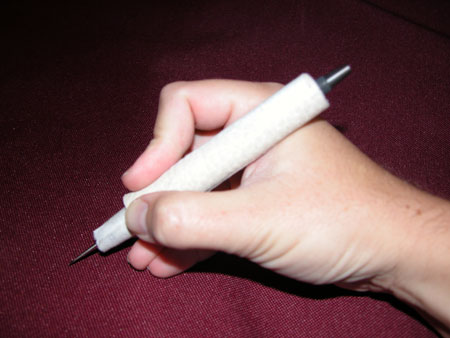
So... I did a super simple modification and wrapped some soft leather around it and taped that in place. Now it's way thicker and has a nice texture. Much improved... but still not perfect for stippling.
So I set out to make the perfect scrimshaw tool, because I just wanted something better. I had gotten my mom one of these pens http://penagain.com a while back when she had hand surgery (btw these are super nice to write with!) and since she wasn't using it anymore I decided to turn this into the perfect too. I cut the business end off below where the end "forks" and hollowed out the inside with the dremmel, inserted a pin vise (I'd cut the back end off this pin vise http://www.hobbylinc.com/htm/zon/zon37-180.htm) and then taped it together to make it extra sturdy. Not too pretty, but yeah it works! I keep the carbide point in this tool. It's a lot less stress on my hand and wrist to use this tool since I'm not so much gripping it as pushing on it.
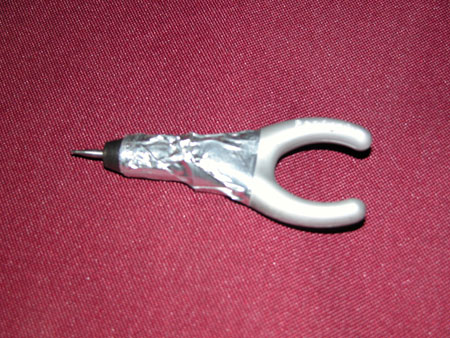

The only problem with that "cool tool" is I find it hard to do line work with it. I'd rather grip a pencil-like tool for making lines. So I use the "cool tool" for stippling, and the leather-wrapped pin vise for making lines.
A little strange, I know, but it all seems to work.
-Katherine
These aren't the greatest pics, left handed photography is not my speciality... And yes I have been told I hold a pencil strangely...
It started with this one, a double ended pin vise from Graphic Chemical. It came with two tips, one steel and one carbide. I like the carbide one better but I really can't explain why, I just do. The one in the pic is the steel tip though. The first couple pieces I did were all using this tool, and I quickly realized I needed to make some changes. It's narrower than a pencil, and gripping this skinny little thing for extended periods of time was giving me some pretty funky hand and wrist pain.
So... I did a super simple modification and wrapped some soft leather around it and taped that in place. Now it's way thicker and has a nice texture. Much improved... but still not perfect for stippling.
So I set out to make the perfect scrimshaw tool, because I just wanted something better. I had gotten my mom one of these pens http://penagain.com a while back when she had hand surgery (btw these are super nice to write with!) and since she wasn't using it anymore I decided to turn this into the perfect too. I cut the business end off below where the end "forks" and hollowed out the inside with the dremmel, inserted a pin vise (I'd cut the back end off this pin vise http://www.hobbylinc.com/htm/zon/zon37-180.htm) and then taped it together to make it extra sturdy. Not too pretty, but yeah it works! I keep the carbide point in this tool. It's a lot less stress on my hand and wrist to use this tool since I'm not so much gripping it as pushing on it.
The only problem with that "cool tool" is I find it hard to do line work with it. I'd rather grip a pencil-like tool for making lines. So I use the "cool tool" for stippling, and the leather-wrapped pin vise for making lines.
A little strange, I know, but it all seems to work.
-Katherine
") If I'm working on a little tiny detail like the eyes then yes I go pretty slow and have to be really careful where I put the dots since I could potentially really mess it up if I get dots in the wrong area. For less finicky areas I go pretty quick. As far as inking goes, I ink it many many many times over the course of creating the image. I'll do a little spot, ink it to see if it looks right, and then either add more dots/lines or move on to the next part. You can also put down a thin layer of ink and work through that, it helps you see your dots better (one of the hardest things is seeing your un-inked marks on the surface of the ivory). I'd suggest some practice pieces to begin with, just work on making lines and curves and gradations. The backs of plastic spoons are okay for that.
If I'm working on a little tiny detail like the eyes then yes I go pretty slow and have to be really careful where I put the dots since I could potentially really mess it up if I get dots in the wrong area. For less finicky areas I go pretty quick. As far as inking goes, I ink it many many many times over the course of creating the image. I'll do a little spot, ink it to see if it looks right, and then either add more dots/lines or move on to the next part. You can also put down a thin layer of ink and work through that, it helps you see your dots better (one of the hardest things is seeing your un-inked marks on the surface of the ivory). I'd suggest some practice pieces to begin with, just work on making lines and curves and gradations. The backs of plastic spoons are okay for that.