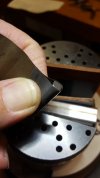
Stones vs Sandpaper

pmace

Elite Cafe Member
Joined
Nov 18, 2010
Messages
230
Location
Arizona City, AZ
I messed up and put some lightly scribed border lines where they shouldn't be. It's a steel practice plate so they can be "erased" with no harm. I don't want to take it to the belt sander and start over, just make the offending lines go away.

Sanding takes quite a while but leaves a nice finish. The same grit with a stone cuts much faster but leaves a dull finish, even with a much finer grit. Also there are more scratches to get out at the next higher grit. I'm using standard Artco 1/4" square "Special" stones (400, 600, 1200) and 3-in-1 oil.

Why do stones perform so poorly? Am I doing something wrong or is that just the nature of the beast?
 

Chujybear

~ Elite 1000 Member ~
Joined
Nov 3, 2011
Messages
1,079
Location
Haida Gwaii
I’m not totally sure I am following you.... but what may be ya-penning is the paper is breaking down, effectively giving you a “higher” finest grit at the end of your process. The stone breaks down as you work, exposing new fresh stone all the time, so it will be a true 1200 polish at the end.
The second possibility is that you are inadequately clearing away the waste from the previous grit of stone, and that is contaminating the subsequent grits.

Something else you can do is burnish away your scribe line... if you are unfamiliar with burnishing, you take a bit of smooth hard metal (a burnasher) and rub in the direction that the scribed line travels,, this will close the scribed line, and save a bit of elbow grease in the sanding department
 

tdelewis

Elite Cafe Member
Joined
Oct 10, 2010
Messages
755
Location
Volant, PA 60 miles north of Pittsburgh
Yes burnish first. It works but may leave a more brilliant surface. Just touch it up with either stone or paper. Did you polish the plate before engraving? If so, use the same after burnishing to touch it up. Just experiment with different methods to find what works best for you. I keep some small piece of wood for a sanding block as well as something round for curved surfaces.
 

pmace

Elite Cafe Member
Joined
Nov 18, 2010
Messages
230
Location
Arizona City, AZ
Now that I think about it the idea that the sandpaper loads up/breaks down to a finer and finer grit makes sense. The stones are well lubricated and the swarf gets removed so you see the actual grit lines. I never thought about burnishing the line to move metal rather than removing it. Good idea.
What causes some scratches to be deeper than others? They all look fine when going in one direction but when you go up to the next higher grit and go at right angles there are some scratches that are much deeper than others. Am I pushing too hard, not using enough oil or using the wrong stone? Or should I stay away from stones altogether and stick with sandpaper?
 

Chujybear

~ Elite 1000 Member ~
Joined
Nov 3, 2011
Messages
1,079
Location
Haida Gwaii
Could be any of those things... and again, Gould be some small piece of grit crumbled off and scoring the surface under your stone... if your stone has squid edges, it could also be that you are slightly tipping your stone, and scoring grooves with the edges
 

pmace

Elite Cafe Member
Joined
Nov 18, 2010
Messages
230
Location
Arizona City, AZ
According to the Artco website softer stones break down faster but are less likely to leave scratches. I guess they are right because the harder "special" stones leave scratches where the softer "fine" stones don't leave as many. I guess it all comes down to picking the right tool/process for the application.
 

Frick

New Member
Joined
Dec 19, 2012
Messages
1
Location
Rigby, Idaho
Personally I would not use stones, they seem to be more unpredictable. I use silicon-carbide sandpaper with oil and wrapped like a taco around keys used for shaft keyways. They are small and come in a variety of widths. I usually use 1/8th to 3/16". They are square and have a nice flat surface so you will not round surfaces unless you intend to. I use grits from 220 to 2000, starting with a grit that is a bit finer that the scratch to take out. (it is an eyeball thing). Cut a strip the length of the key, wrap it around like a taco, matching the end of the key to the edge of the strip. The wrapping gives finger purchase, add oil and start. As you go, you can rotate the taco and get a new surface as the grit wares. when the grit produces an even looking surface, I move up until the finish grit matches the surrounding surface finish. It can take some time but I feel I have much more control of the process. Of course this same approach work with various diameter rod for those concave surfaces as well. 20210128_165809.jpg
 

pmace

Elite Cafe Member
Joined
Nov 18, 2010
Messages
230
Location
Arizona City, AZ
Personally I would not use stones, they seem to be more unpredictable. I use silicon-carbide sandpaper with oil and wrapped like a taco around keys used for shaft keyways. They are small and come in a variety of widths. I usually use 1/8th to 3/16". They are square and have a nice flat surface so you will not round surfaces unless you intend to. I use grits from 220 to 2000, starting with a grit that is a bit finer that the scratch to take out. (it is an eyeball thing). Cut a strip the length of the key, wrap it around like a taco, matching the end of the key to the edge of the strip. The wrapping gives finger purchase, add oil and start. As you go, you can rotate the taco and get a new surface as the grit wares. when the grit produces an even looking surface, I move up until the finish grit matches the surrounding surface finish. It can take some time but I feel I have much more control of the process. Of course this same approach work with various diameter rod for those concave surfaces as well. View attachment 47291
Good idea using keystock as a straightedge. Never heard of using oil with sandpaper. I tried it with some wet/dry and with emery cloth. Seems to work pretty good. Thanks.
 

T.G.III

:::Pledge Member:::
::::Pledge Member::::
Joined
Jul 25, 2009
Messages
345
Location
Oregon
Never heard of using oil with sandpaper. I tried it with some wet/dry and with emery cloth. Seems to work pretty good. Thanks.
Avoid using oils if you're working with argentium, the oil will discolor the metal.
 

Latest posts

Sponsors

Top