Hoping for Inlay Tips

Dani Girl

:::Pledge Member:::
::::Pledge Member::::
Joined
May 6, 2012
Messages
1,211
Location
NSW, Australia.
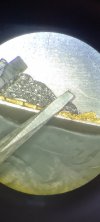
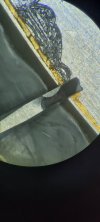
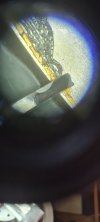
I have a commission and well, I'm rusty. I'm having trouble getting my inlay to stick.

I was wondering if folk might post pictures or videos of their favorite techniques.

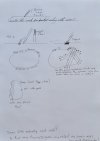
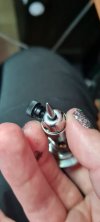
I'd love to better wrap my head around how Barry Lee Hands uses a round point to make his 'undercuts' and I was watching the Fega video by TOS (t'other Sam) the other day and I think I have my head around how to go and shape a graver for undercutting and raising teeth by Sam's preferred method but I'm not 100% sure. I think it's a matter of making essentially a flat graver but if I flip Lindsay's flat template upside down and make the heel angle be the face and I rock the stone I should be able to get quite a rounded off belly. In addition Sam said to knock the edges off. Would that be done by kind of rocking the template side to side while sharpening the belly so you end up with a mostly flat-bottomed graver with a radiused heel but its very corners would be very rounded.

I'll try some illustrations and if anyone had the time to maybe make this a great useful thread with various techniques that would be great.

Can stippling be enough to hold the gold? Perhaps it is more cold welding that anything else happening here. Brian Marshall reminded me I forgot to clean my wire (with acetone or metho?) because oils from my skin would prevent any cold welding.

Danae.
 

Attachments

  • 20221120_120353.jpg
    20221120_120353.jpg
    55.8 KB · Views: 282

SamW

:::Pledge Member:::
::::Pledge Member::::
Joined
Jan 31, 2007
Messages
2,446
Location
Castle Valley, UT in the Red Rock country
I have never believed in "cold welding". It is the teeth and undercuts that make the gold stick. One problem that does not get enough attention in comments is how solidly your base metal is mounted. If there is ANY bounce or vibration you will have a hard time getting the gold to stick. I forget and run into this on occasion with pure gold and even more so with harder alloys.
 

Dani Girl

:::Pledge Member:::
::::Pledge Member::::
Joined
May 6, 2012
Messages
1,211
Location
NSW, Australia.
Yes. I'm working on a titanium knife scale and have it in thermoloc in an aluminium frame that the vice holds solidly in it's leather jaws. I'm not sure if that's solid enough but I think so.

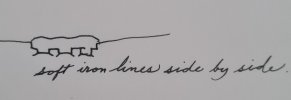
Sam, when you go about putting lines of soft iron into a pocket beside each other, what method of holding that in place do you use?
 

Dani Girl

:::Pledge Member:::
::::Pledge Member::::
Joined
May 6, 2012
Messages
1,211
Location
NSW, Australia.
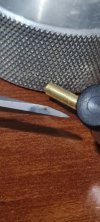
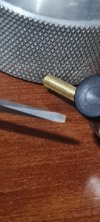
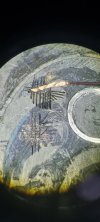
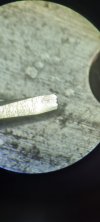
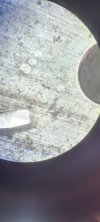
I've had a go this afternoon at making some Sam style inlay chisels. how close did i get Sam? I dubbed the two tips minusculey but I wasn't sure how to go about rounding her any. I couldn't find my hammers so I opened my Lindsay palm control all the way to jackhammer setting, 60psi. heavy piston and gave the copper some brief presses down. I tried to pick it off pretty hard then tried getting under some corners and got some of it off mostly where there were no cuts. I've never succeeded at all at this, I like the rounded bottom flat inlay chisel very much. How could i improve? I'll try some pockets and project pieces over the coming week. What's the hardest inlay material you'd trust this method to hold? copper was maybe 28 guage, didn't anneal but it comes fairly soft. steel was circular saw steel.
 

Attachments

  • 20221120_190717.jpg
    20221120_190717.jpg
    89.2 KB · Views: 189
  • 20221120_190722.jpg
    20221120_190722.jpg
    87.7 KB · Views: 185
  • 20221120_190338.jpg
    20221120_190338.jpg
    99.9 KB · Views: 189
  • 20221120_190919.jpg
    20221120_190919.jpg
    108.4 KB · Views: 191
  • 20221120_191250.jpg
    20221120_191250.jpg
    145.2 KB · Views: 191

Dani Girl

:::Pledge Member:::
::::Pledge Member::::
Joined
May 6, 2012
Messages
1,211
Location
NSW, Australia.
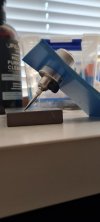
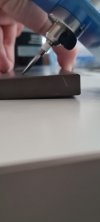
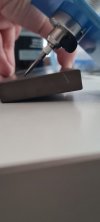
I think I was working at about this angle
 

Attachments

  • 20221120_192721.jpg
    20221120_192721.jpg
    44.9 KB · Views: 101

SamW

:::Pledge Member:::
::::Pledge Member::::
Joined
Jan 31, 2007
Messages
2,446
Location
Castle Valley, UT in the Red Rock country
Your angle looks OK. Frank Hendricks always said about 70 degrees. Your chisel looks OK...for a start...at that stage I hand massage the belly and sharp edge of the chesil into a slightly rounded shape across the face of the chesil.. The idea is when I cut teeth by moving the chesil sideways, making a continuous line the edge of the chisel does not scrape away metal as it would if left sharp. You could do that with your chesil at just the edges for the same effect and make the corners stronger at the same time. These teeth are used for inlaying pure gold.

I will look for a photo of one of my chisels.

Sounds like you have a solid mount. Clamp it tight in the vise.

I don't usually inlay mild steel wire side by side but when I do I make separate channels for each wire with strong undercuts to really hold the wire. As you hammer it in and burnish it will look like one piece.
 

monk

Moderator
Staff member
::::Pledge Member::::
Joined
Feb 11, 2007
Messages
10,962
Location
washington, pa
dani girl: there are a few very good videos on the inlay procedure. the search bar here or on google may show them. good luck. i hope you find a good solution.
 

Dani Girl

:::Pledge Member:::
::::Pledge Member::::
Joined
May 6, 2012
Messages
1,211
Location
NSW, Australia.
I thought I'd just share a few videos a quick youtube search shows

This one's just tapping gold wire into scroll outlines (all undercuts already done but good hammer technique)

This one's a chap doing a little tapered line displacing the undercuts, half an hour long

This one is a ?fishing lure? being inlayed, looks like pretty good technique with a tiny knife/flat undercutting tiny tapering lines and a flat making teeth in the bottom of his pocket. He skips the bit I wanted to see most how he went with all the converging lines. Just music and action.

It's a shame this is only one minute, could watch him work all day

Another video of lines being inlayed, just music and action. Nice work.

Lee Griffiths holding a gun in his hand and re-inlaying a pheasants tail which was coming adrift, nice music
https://www.youtube.com/watch?v=asbuh9qnlpw

Three lines of inlay side by side tapered down to one, teeth raised with a flat
https://www.youtube.com/watch?v=GQH1OTgNntw&t=59s
 

Dani Girl

:::Pledge Member:::
::::Pledge Member::::
Joined
May 6, 2012
Messages
1,211
Location
NSW, Australia.
Well I didn't get to practicing any inlay this weekend seeing as Sam Alfano had a DVD special I bought some instant watch DVDs and watched the shading master class this weekend and found a phone drawing app that works with the s-pen that slots into my Samsung Galaxy Note 10. My favorite so far is Concepts but there are a few others I might become more fond of. I think I might give concepts the one off $20 so i can save in vector and my artwork could be printed at any size and maybe even used as designs on bottles or such. I imagine there is a lot of complicated rigmarole to do that.

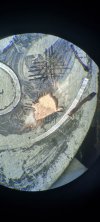
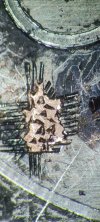
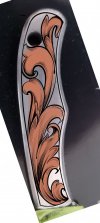
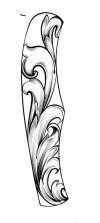
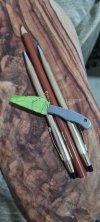
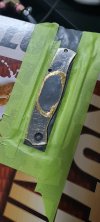
I got this tiny Spyderco prepped and this design done, let's see if I can get this inlay done well next weekend. Then back to my commission.
 

Attachments

  • Untitled 7 (2).jpg
    Untitled 7 (2).jpg
    79.8 KB · Views: 84
  • Untitled.jpg
    Untitled.jpg
    50.3 KB · Views: 79
  • Leaf (2).jpg
    Leaf (2).jpg
    42.4 KB · Views: 75
  • attempt no one in concepts (2).jpg
    attempt no one in concepts (2).jpg
    26.6 KB · Views: 82
Last edited:

Dani Girl

:::Pledge Member:::
::::Pledge Member::::
Joined
May 6, 2012
Messages
1,211
Location
NSW, Australia.
Hubby looked back and forward and back and forward and said, it will be very wee!
 

Attachments

  • Untitled 7.jpg
    Untitled 7.jpg
    60.7 KB · Views: 57
  • 20221127_171924.jpg
    20221127_171924.jpg
    84.8 KB · Views: 58

Dani Girl

:::Pledge Member:::
::::Pledge Member::::
Joined
May 6, 2012
Messages
1,211
Location
NSW, Australia.
20230112_132622.jpg
 

Attachments

  • 20230112_132605.jpg
    20230112_132605.jpg
    65.2 KB · Views: 56
  • 20230112_131254.jpg
    20230112_131254.jpg
    75.2 KB · Views: 56
  • 20230112_131250.jpg
    20230112_131250.jpg
    49.7 KB · Views: 56
  • 20230112_130636.jpg
    20230112_130636.jpg
    33.9 KB · Views: 57
  • 20230112_130359.jpg
    20230112_130359.jpg
    51.3 KB · Views: 57
  • 20230112_130342.jpg
    20230112_130342.jpg
    78.1 KB · Views: 54

Dani Girl

:::Pledge Member:::
::::Pledge Member::::
Joined
May 6, 2012
Messages
1,211
Location
NSW, Australia.
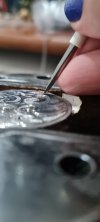
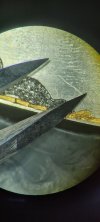
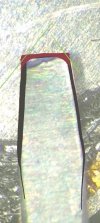
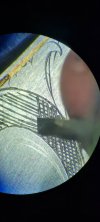
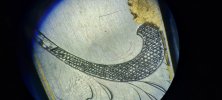
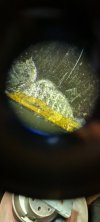
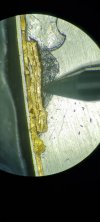
So I'm trying again today. I'm not having much luck today. every time I try to swipe these points through titanium I just leave chunks of the graver behind in the grooves that I wanted the gold to 'flow' into (when whacked adequately). I did successfully re-install the border bits that I hammered below the surface by leaning my round brass punch without realising as I swiped over the area. I did the re-installing by hammer and punch instead of handpiece and a full 1/8" punch instead of tapering it down. the border lines were fairly well stuck, but I added some extra teeth anyway on the re-done sections.

The larger groover is carbide and the smaller m-42. What do I do, just keep making them stubbier and rounder til one stops breaking or go down to hss (which will require resharpening basically every line).???

Does anyone else use Barry Lee-hands method of undercutting by driving in a rounded point? Would that work with wire installation of large cavities?
 

Dani Girl

:::Pledge Member:::
::::Pledge Member::::
Joined
May 6, 2012
Messages
1,211
Location
NSW, Australia.
I've been tipping the template slightly as I swipe to round off the face and belly and also just tipping it on its slide to knock the corners off
 

Dani Girl

:::Pledge Member:::
::::Pledge Member::::
Joined
May 6, 2012
Messages
1,211
Location
NSW, Australia.
so the slight tipping rounds off the grooves graver as per the red marks and putting it on its side dubs the corners off as per the green lines.
 

Attachments

  • grooves graver.jpg
    grooves graver.jpg
    82.7 KB · Views: 71

JMiller

Elite Cafe Member
Joined
Oct 30, 2011
Messages
519
Location
Huntsville, AL
I have found that it helps if my tip is narrowed a bit more don’t round the corners just take the corners off and with just a slight heel on the tip no dubbing…. never tried titanium. Of course this can vary depending on the area of inlay, I use Roland Baptiste’s inlay template.
I also have found that when doing inlay it’s easier for me to raise burrs one at a time side by side using SamW and others method in the three different angles rather than trying to cut lines. I have done it that way with success but get better results side by side.
Thierry Duguet has some YouTube videos with inlay where it looks like he just pretty much stipples the background for inlay?… interesting to watch.
 

Adder

Elite Cafe Member
Joined
Aug 19, 2013
Messages
325
Location
Mo i Rana, Norway
I have found that it helps if my tip is narrowed a bit more don’t round the corners just take the corners off and with just a slight heel on the tip no dubbing…. never tried titanium. Of course this can vary depending on the area of inlay, I use Roland Baptiste’s inlay template.
I also have found that when doing inlay it’s easier for me to raise burrs one at a time side by side using SamW and others method in the three different angles rather than trying to cut lines. I have done it that way with success but get better results side by side.
Thierry Duguet has some YouTube videos with inlay where it looks like he just pretty much stipples the background for inlay?… interesting to watch.
I have also seen the video from Thierry Duguet where he just stipples the background. Wonder if it`s strong enough for holding the gold in place? Maybe he use different angles when he make such undercuts. Can anyone tell?

Jørn-Ove
 

Dani Girl

:::Pledge Member:::
::::Pledge Member::::
Joined
May 6, 2012
Messages
1,211
Location
NSW, Australia.
20230115_192625.jpg
 

Attachments

  • 20230115_132547.jpg
    20230115_132547.jpg
    83.7 KB · Views: 60
  • 20230115_133059.jpg
    20230115_133059.jpg
    98.2 KB · Views: 60
  • 20230115_123445.jpg
    20230115_123445.jpg
    63.3 KB · Views: 60
  • 20230115_124305.jpg
    20230115_124305.jpg
    87.1 KB · Views: 63
  • 20230115_124312.jpg
    20230115_124312.jpg
    40.1 KB · Views: 63
  • 20230115_143453.jpg
    20230115_143453.jpg
    40.4 KB · Views: 65
  • 20230115_143502.jpg
    20230115_143502.jpg
    28.7 KB · Views: 59
  • 20230115_143501.jpg
    20230115_143501.jpg
    29.9 KB · Views: 55
  • 20230115_143500.jpg
    20230115_143500.jpg
    30.2 KB · Views: 56

Latest posts

Sponsors

Top