
mdengraver
~ Elite 1000 Member ~
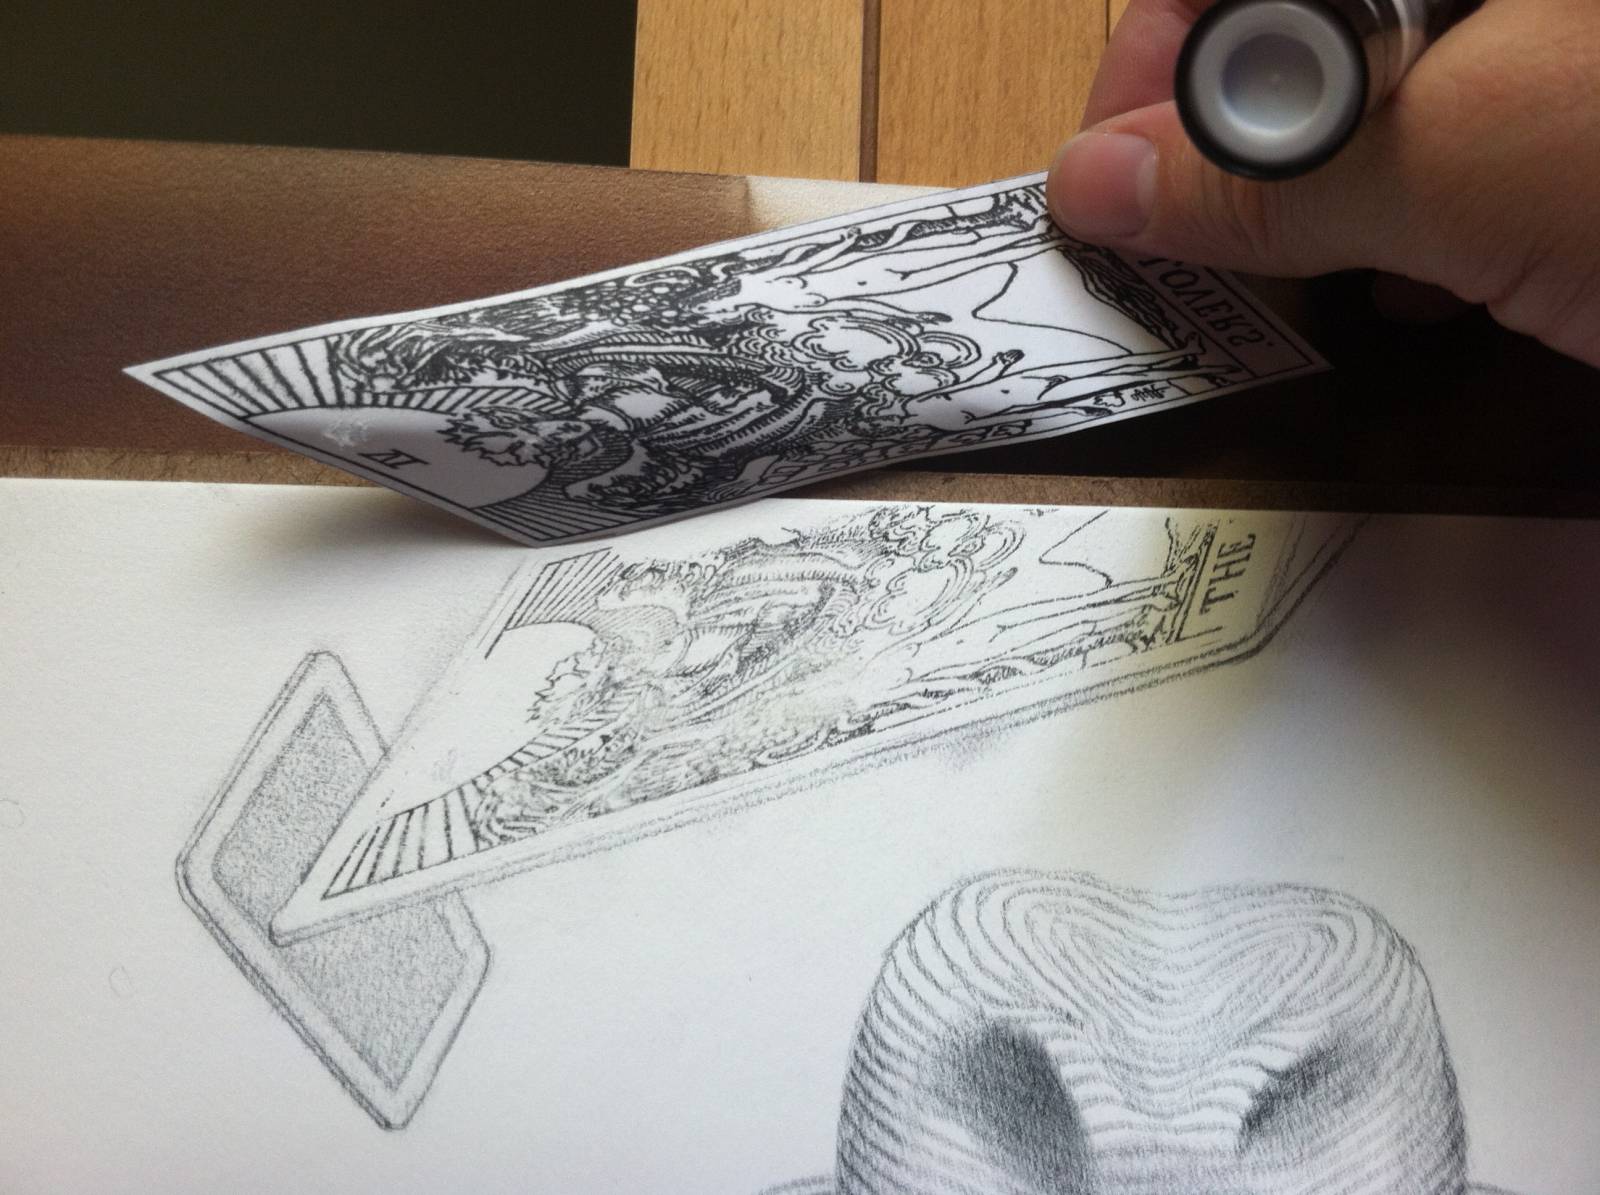
Acetone Transfer Method
 www.muddycolors.com
How to Do Acetone Transfers
Traditional painters run into lots of issues that digital artists don't have to worry about. One of those issues is painting extremely fine lines, which can be difficult if those lines are finer than your smallest brush. Usually in a case like this, I would rely on a tight drawing to do the work, bu


