Dan_the_DJ
New Member
Hello there,
This is my first post on this forum.
You can call me Dan, Im from Serbia and I just started engraving a few days ago.
Its quite a complimentary hobby to have alongside blacksmithing and I sense great things ahead, if I can figure it out that is
One thing I can say right of the bat:
Engraving is the most relaxing and fun things Ive ever done, its amazing!
(I have to add, this only became fun when I made a proper set of engravers, before that, it was a pain)
Im mostly interested in wire inlay, for now, and I have made these two gravers to do it:
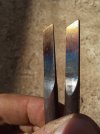
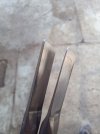
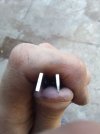
One for cutting the channel and the other for undercutting.
The angles are not perfect and HT was eyeballed, but everything turned alright it seems.
Heres a couple of pics of my practice work so far (Im working up the courage and skill to do some sort of pattern on my machete guard):
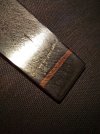
My first inlay ever. The channel was cut with a hacksaw, because my makeshift chisel wasnt very good as you can see next to my line...
First question: Why is the line so wavy when it was cut with a hacksaw, straight as an arrow?
Next up, we have my second attempt with makeshift chisels, just to see how well can I blend three copper wires together.
Seems seamless
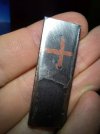
Very nasty lines because the chisel was bad, but I managed to cut and undercut without wanting to cry, a success!
Then I decided to do a bit of actual research and I made proper tools and tried to inlay a square:
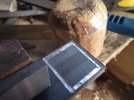
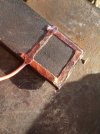
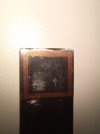
Much better, cleaner channels and nice undercuts with barbs on the bottom, but still those wavy lines when I touch it up.
How can I get rid of that?
I also suck at making corners, the chips bunch up and I cant get them out without ruining my lines...
Can going over the design with a file or a stone fix my issue of wavy lines and bunched up chips in the corners or will I just make a bigger mess by bringing everything down?
Also, I noticed that after undercutting, I get raised edges of steel... Can I file those down flush or not?
And lastly, to get back to the title of my post:
How does one undercut a circle shaped indentation?
I read this tutorial for wire inlay on instructables and the guy who made the tutorial didnt show how he did it.
He explained everything else pretty well, kudos. He punched a circular groove with a round punch easy enough, but Im left in the dark on how he undercut it...
Im sorry for the long post, but I have no idea what Im doing when it comes to inlay and engraving. If anyone can spare the time to answer any of my questions and point me in the right direction, that would be of immense help!
Thank you all very much for your time and help, cheers.
This is my first post on this forum.
You can call me Dan, Im from Serbia and I just started engraving a few days ago.
Its quite a complimentary hobby to have alongside blacksmithing and I sense great things ahead, if I can figure it out that is
One thing I can say right of the bat:
Engraving is the most relaxing and fun things Ive ever done, its amazing!
(I have to add, this only became fun when I made a proper set of engravers, before that, it was a pain)
Im mostly interested in wire inlay, for now, and I have made these two gravers to do it:


One for cutting the channel and the other for undercutting.
The angles are not perfect and HT was eyeballed, but everything turned alright it seems.
Heres a couple of pics of my practice work so far (Im working up the courage and skill to do some sort of pattern on my machete guard):

My first inlay ever. The channel was cut with a hacksaw, because my makeshift chisel wasnt very good as you can see next to my line...
First question: Why is the line so wavy when it was cut with a hacksaw, straight as an arrow?
Next up, we have my second attempt with makeshift chisels, just to see how well can I blend three copper wires together.
Seems seamless

Very nasty lines because the chisel was bad, but I managed to cut and undercut without wanting to cry, a success!
Then I decided to do a bit of actual research and I made proper tools and tried to inlay a square:


Much better, cleaner channels and nice undercuts with barbs on the bottom, but still those wavy lines when I touch it up.
How can I get rid of that?
I also suck at making corners, the chips bunch up and I cant get them out without ruining my lines...
Can going over the design with a file or a stone fix my issue of wavy lines and bunched up chips in the corners or will I just make a bigger mess by bringing everything down?
Also, I noticed that after undercutting, I get raised edges of steel... Can I file those down flush or not?
And lastly, to get back to the title of my post:
How does one undercut a circle shaped indentation?
I read this tutorial for wire inlay on instructables and the guy who made the tutorial didnt show how he did it.
He explained everything else pretty well, kudos. He punched a circular groove with a round punch easy enough, but Im left in the dark on how he undercut it...
Im sorry for the long post, but I have no idea what Im doing when it comes to inlay and engraving. If anyone can spare the time to answer any of my questions and point me in the right direction, that would be of immense help!
Thank you all very much for your time and help, cheers.


