
sdcoxx
Elite Cafe Member
Hello Cafe Members,
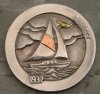
Since taking Jeremiah Watt's Western Silver class, I have been in love with Bright polished borders.
I have found them to be VERY difficult to photograph....
Sadly, I have spent hours experimenting to acheive the two examples posted....
Your suggests would be welcome.....
Thank you,
Stephen
Since taking Jeremiah Watt's Western Silver class, I have been in love with Bright polished borders.
I have found them to be VERY difficult to photograph....
Sadly, I have spent hours experimenting to acheive the two examples posted....
Your suggests would be welcome.....
Thank you,
Stephen
Attachments
-
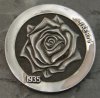 arose3 004_edited-2.jpg183.9 KB · Views: 212
 -
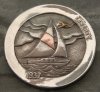 arose 002_edited-1 copy_edited-1.jpg183 KB · Views: 200


") .
.


