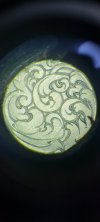
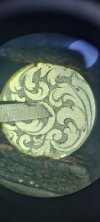
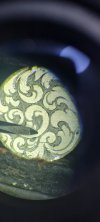
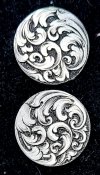
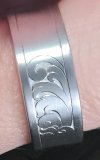
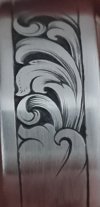
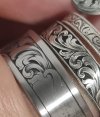
that is very beautiful and fantastic work Danae, I have only started posting on the forum myself since your absence but I have seen other posts in the archives of your engraving and I must say that I am a fan of your work! I am glad to see you are still at it =)
You are using an out of date browser. It may not display this or other websites correctly.
You should upgrade or use an alternative browser.
You should upgrade or use an alternative browser.
still kicking
- Thread starter Dani Girl
- Start date
I love it like crazy, since you posted it I've been watching it all the time. May you achieve everything you want, congratulations!
thankyou Travis. I'm glad to read thisGood to see you back--I've recently wondered what you were up to. Probably too long ago (and brief) for you to have any reason to remember, but you're one of the first engravers I ever corresponded with back when I was wanting to get into it circa 2013 or so. I appreciated your feedback then, and your scroll design style is still one of my favorites I've seen in all the years since. I still refer to your work for design inspiration. The Danae+Del Raso combo always makes me smile as well.
the viking design was drawn for me by a tattoo artist. Mick Butterworth. we were swapping designs for engraving lessons. it was very fun and the work that came out of that collaboration got lots of great feedback. he's a good engraved now which is awesome to see and have had some part in helping him get started.
I find myself more and more in a kind of teacher role but I also don't know the answer to many questions. I really would appreciate feedback so I can learn further, develop better skills and know answers for others.
I was fairly pleased with my 116 v graver work... but when I pulled out the flat to cut the background flat I was running into scrollwork with the belly of the graver and it really wanted to dive all the way to China and not just knock the tips off of where I'd gone to and fro in the background with the v. higher heel? different face angle? different pressure or piston or...??? what am I doing wrong when a graver just wants to dive? how do I not mess up my initial outlines when backgrounding? ta
When I remove the background I use a single point 90 degree graver to get in tight places then stipple or dot punch background never used flat graver. J.J.
thanks for that reply JJ. so you just go across one way or some convenient way or criss cross til it's close to flat with a v... hmm, my engraving does usually survive that step, it goes wrong when the flat comes out, maybe even more so in tiny work, tight corners or soft metals.When I remove the background I use a single point 90 degree graver to get in tight places then stipple or dot punch background never used flat graver. J.J.
Dani Girl, For engraving in stainless use Lindsay's Carbalt gravers sharpen in 116 and a 90 degree for guns in stainless. J.J.
farmer57
Member
You can also 'sacrifice' one or two (or more) gravers and grind out an area immediately behind face/heel. I use this a lot when voiding tiny areas to be enamelled (where deeper voiding is needed). Easy to do with round diamond burr - you can grind 'back' as far as you need to not risk running into your outlines. I leave about 1-2mm of original graver profile so there is some room to re-sharpen. HSS gravers seem to not break as often as carbide. Hope this helps.I was fairly pleased with my 116 v graver work... but when I pulled out the flat to cut the background flat I was running into scrollwork with the belly of the graver and it really wanted to dive all the way to China and not just knock the tips off of where I'd gone to and fro in the background with the v. higher heel? different face angle? different pressure or piston or...??? what am I doing wrong when a graver just wants to dive? how do I not mess up my initial outlines when backgrounding? ta
mitch
~ Elite 1000 Member ~
- Joined
- Jul 23, 2007
- Messages
- 2,653
Remove background from the middle out. Everyone makes the mistake of “outlining” the background cavity first, then having to recut it to clean up all the dings. Wherever the area is big enough, hog out the center, letting the perimeter protect the edges, then cut the outline last.what's the trick to just getting the background out without making a mess of what you have already done and needing to re cut everything?
You’re doing some beautiful work, young lady, and I am very pleased to see you are still at it.
I guess if you have criss-crossed it with a v first you've got a depth gauge and no reason not to start in the middle. I'll give it a go... I'm curious.Remove background from the middle out. Everyone makes the mistake of “outlining” the background cavity first, then having to recut it to clean up all the dings. Wherever the area is big enough, hog out the center, letting the perimeter protect the edges, then cut the outline last.
You’re doing some beautiful work, young lady, and I am very pleased to see you are still at it.
so process wise I've outlined the knife by taking a picture of it and getting my artwork onto different layers on concepts which has measuring tools and canvas sizes and is a bit tricky to print to actual size on but it can be done. then I did a damar varnish and laser printer on baking paper transfer. made a few registration dots but not too many as you see what you're doing clearer after wiping it clean


