Question: What is the purpose of polishing a graver?

Joined
Aug 24, 2012
Messages
52
Location
Louisville, KY, USA
While I am still in the beginning stage of this art form, I have not been blind to the fact that in many of the you-tube videos I watch, the gravers, for the most part, are polished. When I took my basic hand class, we took it to 1200 on the Graverhone and that was the end of it.

I'm guessing that the class was designed to give the pupil the basics of what he/she needs to know to travel along on their path.

Since my recent lesson in stainless has taught me a thing or two, I've decided to devote some time to sharpening a modest supply of gravers in preparation for my next practice session. This time , of course, will be in much softer metal. But, before I get them all to 1200, a question emerged in my head. "Why would I need to go further?"

So the question has been posed.

Why does anyone polish a graver to a mirror finish? and why?
 

dhall

:::Pledge Member:::
::::Pledge Member::::
Joined
Jan 1, 2008
Messages
147
Location
San Diego, California
In the jewelry trade, a lot of folks want things shiny. The more highly-polished the face and heel of the graver, the more reflective are the graver cuts. This is virtually a sacrament when it comes to using a graver for stone-setting, e.g. bead and bright-cut and pave.

If you are going to darken your engraving, the highly-polished surfaces of a cut might actually be a detriment. If the surface is really slick, some darkening agents might not stick as readily.

If you're engraving on highly-polished surfaces, an argument can be made to have a less-polished graver so the cuts have greater contrast by having a duller surface. The graver is still plenty sharp enough to cut, but simply has a less-shiny surface in the cuts and they may show up better, next to a polished surrounding surface.

Sometimes it comes down to personal preference, and a consideration for the desired result for the finished piece.

Best regards,
Doug
 

T.G.III

:::Pledge Member:::
::::Pledge Member::::
Joined
Jul 25, 2009
Messages
355
Location
Oregon
As Doug mentioned above, the jewelry industry really likes their work to sparkle, lettering, western bright cut, and Flare Cutting are areas where you want a highly polished graver.
 

Mike576

Elite Cafe Member
Joined
Nov 20, 2020
Messages
263
Location
Ledyard Connecticut
For most engraving I do I darken with ink afterwards so I only sharpen to 600 grit. But occasionally for a bright cut or if I plan to leave it shiny I mirror polish the graver on Lindsay mirror grade sheets. Makes it really sparkle. It’s case dependent though as stated in other comments.
 
Joined
Aug 24, 2012
Messages
52
Location
Louisville, KY, USA
In the jewelry trade, a lot of folks want things shiny. The more highly-polished the face and heel of the graver, the more reflective are the graver cuts. This is virtually a sacrament when it comes to using a graver for stone-setting, e.g. bead and bright-cut and pave.

If you are going to darken your engraving, the highly-polished surfaces of a cut might actually be a detriment. If the surface is really slick, some darkening agents might not stick as readily.

If you're engraving on highly-polished surfaces, an argument can be made to have a less-polished graver so the cuts have greater contrast by having a duller surface. The graver is still plenty sharp enough to cut, but simply has a less-shiny surface in the cuts and they may show up better, next to a polished surrounding surface.

Sometimes it comes down to personal preference, and a consideration for the desired result for the finished piece.

Best regards,
Doug
it seems that even when I'm not cutting I will learn something. Thank you for your insight.
 

ByrnBucks

:::Pledge Member:::
::::Pledge Member::::
Joined
Dec 25, 2020
Messages
213
Location
Chattanooga, TN
Since my recent lesson in stainless has taught me a thing or two, I've decided to devote some time to sharpening a modest supply of gravers in preparation for my next practice session.

I think it was a Ken Hunt video that showed the narrower the angle, the darker the reflection of the cut to the un-aided human eye. I plan to sharpen these to 80, 70, 60, 50 and 45. There are 2 each. I was toying with the idea of 2 different face angles. like maybe 50 and 60.
Good evening Always learning,
Been watching both your threads and wanted to throw a couple of things out at once.

Firstly your practice plate in Steel, maybe as someone previously stated take a step back and practice on a softer metal, copper was a wonderful teacher for both graver control and learning to follow layouts as slight deviation can rune a well thought out design.

Next the narrow angles you speak of 80 to 45 if I’m not misinterpreting your intentions, hold off on that, 90 degrees is a very narrow line when cutting try utilizing this angle for finer shading and cutting and later down the road if you still feel the need experiment with a lesser angle.

This one is purely preference and is just an observation from trying the same thing and felt it was having a slightly negative effect on quality and progress during a given project. While having a stock pile of sharp gravers seems like a great idea and almost common sense it can seem to encourage “rushing” and lead to frustration giving way to butchering lines… this maybe a poor way of conveying the actual feeling that happens when you snap a tip then with no cool down time diving straight back into that line and breaking another tip, this can double or triple frustration and I find cutting cleans line can very much be tied current state of mind. Don’t get me wrong I do some projects that need to be completed in one sitting and do keep several sharp and ready Togo but only if its just a couple of more lines means getting done and going to bed.

Lastly even though it can be boring but get a practice plate and fill it up with nothing but controlled lines. Even straight lines trying to control the depth and therefore the width of each line. once you can duplicate line after line and they all feel effortless conform to one another then when your cutting a design you can shift you focus to the task at hand as grave control will almost be subconscious. Repeat this for curved lines and S curves, I believe more than a few of these fine seasoned engravers and teachers have posted practice plate templates.

Hope this helps even if just something to keep in mind, and have a wonderful week. BB
 
Joined
Aug 24, 2012
Messages
52
Location
Louisville, KY, USA
Thank you for your enlightenment, BB. It is appreciated. I am listening. Which is sometimes better than just hearing.

That stainless "mess" (or catastrophe, or disaster) was actually a powerful learning lesson for me. Many might be
hesitant to show off their bad work, but I'm not.

When I received my Certificate of Completion for the successful completion of the intensive basic metal engraving, I realized that the week I spent in Emporia was in fact just that. Intensive.

So much so, that by Wednesday afternoon of that week, I had given up trying to follow along. I'd try to go ahead with the new lesson, But as the lessons progressed, I knew my lines still looked bad. And with the pace of the lesson plan, they were not going to improve. So I knew I had to focus on the basics of cutting a consistent straight line.

No matter how much gold dust you sprinkle on a pile of poop, in the end, it's a pile of poop. And if my lines don't look good from the start......well, I think you see where I'm going.

My reasoning for creating gravers with different shapes is inspired by the work of Sadeler. It's fascinating to me how the cuts one can make in metal, reflect the light in different ways, by whichever angle they are presented to the observer. In a way, engravers are illusionists. And in my opinion, the best of the craft.

I made my modest supply of gravers so that I wouldn't have to spend the 8 or so hours it took to create my supply of 7 (3-105s and 4 120s) by hand. As I'm practicing with a 120, I'm noticing a bit of heel drag. (which tells me they are all like that), so now I'm gonna have to reface them. But I'm running with it for now.

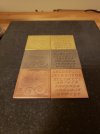
Referring to the softer metals you suggest. I spent some time today preparing some plates for my session tomorrow. These are practice plates from Glendo. I just hit them with some finer grit sand paper and did an acetone transfer. The transfer, I think, came out pretty good.

"Lastly even though it can be boring but get a practice plate and fill it up with nothing but controlled lines."
-
ByrnBucks

Speed, Depth, Chip Width, forcing the handpiece, relaxing the hand, watching the shape of the graver as it might list from side to side and create an inadvertent bright cut, foot pressure on the pedal......Maybe I should go more strokes per minute.....maybe I should go less.... and that face really needs a more polished surface. I think I need that reflection to be a bit more.....consistency

Practice isn't often boring for me, and I'm always learning something.

AL12
 

Attachments

  • Portrait_of_Rudolph_II_MET_DP102234.jpg
    Portrait_of_Rudolph_II_MET_DP102234.jpg
    281.1 KB · Views: 22
  • acetone transfers.jpg
    acetone transfers.jpg
    78.5 KB · Views: 23

Latest posts

Sponsors

FEGA
Top