I tried to undercut the border then make teeth... this didn't quite work. several sections needed to be reapplied several times. lots of wire falling to the floor, very clumsy. some sections I actually dug a round channel with a bur and used a pointy bulino tool to add teeth as the surrounding work was all in but when flattening with lighter taps with the handpiece it work hardens and warps and when it's not held down you hit one bit and the other end walks up out of the hole. . that stuck. I honestly don't think my teeth would have held gold either. I'm just not getting sharp strong grooves
after another full day of work from where I lost enthusiasm a year or more ago I got a copper background with only a few small patches where I'd punched too hard or on an angle. it's only for me so that ok
I then got into concepts and using a spray spatter brush and white paint and darker paint drew this as my guide for today's work. (I truly don't know how to salvage left cats face... I tried to use lines to create the fur but it needed to be dots given he's so small. I also made deep cuts for the spots and went too deep around his mouth and nose and well... he's a mess ). I have burnished his face. I have sanded half my work off after trying to make dots for the sky without removing the burs... disaster. they all caught dirt and it looked an epic mess. doing again with tiny dashes flicking the chip each time. Oh... the red marks are areas i planned to do a bit more to today too
I am not sure how much more ill do to this. I am very keen if anyone has any pointers to improve it without sanding all my efforts off. Id rather have the piece that i can show students and say do this, not this....
I started this bird some seven or so years ago. The tag was stainless. This took an extremely long time and was quite hard. I think bulino in silver is more pleasant to do.
I really struggled for a smooth grey on the sky. when I'd pull back and look by the naked eye it looked very spotty, like I had lots of little dots and big ones too or something. I tried to pull the bird forward by pushing the sky and hills back by darkening them but doing the reverse would have been better. should I have used dashes instead of dots for the sky?
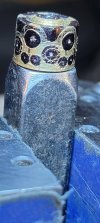
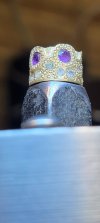
How do i set stones?
I think I need a flex shaft with a foot pedal as I try to do what I see on youtube and just can't get the same results with my micromotor. I can drill the hole but as soon as I touch a round bur to the hole it grabs and chatters and walks off and I instantly have this wild raggedy looking gouge instead of a seat for a stone. Can anyone advise what I need. Micro-pave type setting appeals to me most but I would also like to be versatile.
for this kind of work I would advise against a flex-shaft tool, they have plenty of torque and power but are harder to control and still pull a lot because they are a low speed tool.
I haven't done a ton of stone setting but what I have done was done with an ultra-high speed air rotary tool, the power carver 400xs is an example and what I have used for stone setting, unfortunately they are fairly expensive (looks like it's on sale for $400 from $550 at https://scmsysteminc.com/power-carver/ ) however if you look around there are sever other brands out nowadays and I seem to remember coming across a web post a year or so ago comparing 5 or 6 different brands some of which (if memory serves correct) were close to a quarter of the price of the 400XS, also you may look into a rotary dental tool as it may be a cheaper option but I'm not sure..
I have used (for other projects) one of these 65,000 RPM hand tools that you can get for about $20 on Amazon.. https://www.amazon.com/Air-Powered-...pcontext&ref_=fplfs&psc=1&smid=A1NE1K2SUI6UFL
and they are OK but for this type of job you will fight them.. if you learn to control it right (which for extended projects will cause a lot of strain and cramping in the hands...) then the next biggest problems is finding burs that are fine enough to do this detailed work as they use .125 inch shaft tools and most of them that I have used are rather large in the bur..
I also use a Foredom flex shaft tool pretty much daily for stock work and other heavy duty projects, they CAN be used for decent detail work but the shaft is far to stif and unrully to want to do any detailed setting work for long periods of time in my opinion.
Admittedly I don't know if there are or have experience with higher speed smaller flex shaft tools..
I believe the thing you want is RPMs in the range of 150,000 + you can stall it out fairly easily because it doesn't have a lot of torque, but at that speed it feels more like drawing with a pencil then cutting with a rotary tool and you can make those fine cuts and inlays without it grabbing and running away. it is designed to cut at high speed so rather then putting a variable foot controll on it what I have done is just put an on-off foot pedal on it's airline to make it more easily manageable. another cool thing about those ultra-high-speed tools is that you can use them to cut on glass and eggshells and many other surfaces that are nearly impossible to cut otherwise.. also you could use it to do some of your background removal that you mentioned in another of your posts..
you can find dental burs online for them at a reasonable price, you just need to look for anything with an "FG" size shaft which is .0625 inch they make them with pointed tools, cylinder shaped tools with round or flat shaped ends, round burs that can go althe way down around .020 inch (.5MM) in diamiter.
is that stainless or silver you are inlaying into? looks like a silver chain with stainless pendent. I know that rolling those prongs in stainless without breaking them is a tricky job from hearsay and from how it reacts engraving, but I haven't done any setting in it so I'm not likely to be a lot of help advising with that one..
Edit:
I also know of people who use a drill press with a stop set to get uniform sets for stones too so it's not like any one tool is the only way to go, but there are certainly tools that are better suited for any particular job..
As I said in the start, I don't have a lot of experience setting stones but that's my 2 cents and I'm sure we can get some input from some other folks too
I set loads of stones every week. I use a powerful micro-motor. Brand is Seashin. Model is OZ Black.
It has high torque. So it will not get stuck as easily as a weaker motor.
Flexshafts are not ideal for precision work in my opinion. You have to fight the whole bendy spring part constantly. So stick with a micro-motor.
For most burrs I use 3000RPM so quite low. Only for the small straight or tapered burrs I use 6000RPM.
You want power not speed.
I only use ball burrs to make the seats. You dont need any fancy seat burrs.
I do both micropave and big stones with the round burrs. Only for prong work I will use other burrs.
You don't want High rpm for your tools! You will over heat your burrs and they will go dull in no-time.
The burr biting and running off on you . Is either that your technique is incorrect. Or the burr is damaged. Check under your scope if all the teeth are still good.
Try to push harder on the burr when you go in. And also make sure it is turning when you put it in the hole if you have a weaker motor that is more important.
I stand corrected.
I guess I at least got the bit about the unruliness of a flexshaft right..
I am curious, if the slower RPM and higher torque is more manageable for cutting stone seats, how does a micro-motor perform when cutting other more brittle mediums? such as glass, eggshell, mother of pearl, or abalone?
This may be a unusual question, but have you ever used it to try and remove a broken screw or tap from a hole? I'm curious of other advantages of the torque over RPM and if, with appropriate technique, there is any true benefit to higher RPM..
For stone setting I use only flexible shaft tools at low speed. Position of the stone marked with a deep dot from a scriber, I drill first a 0.5 mm hole through the metal with a spiral drill. For the rest of the work I use round dental burrs, got tons of them from the flea market and collecting boxes I left at the dentist’s. I open up the hole to about 50-60% of the stone’s diameter, often also through the whole piece. Then I use a larger burr to make the seat for the stone. If it would chatter, I reverse the direction of rotation. Build a special controller for this, with a selector switch for my 5 flex shafts. The burr will still remove material if rotated in the wrong direction, but much slower and without chatter. I set down the burr on the metal and start rotation slowly with the foot pedal. Thanks to Ganoksin for the “reverse rotation” idea…
I strive to drill the seat such that the stone fits tightly into it. In case of doubt, I use a one size smaller burr and rotate it arround in the seat to enlarge it a bit. In such seats, gipsy setting works as well as bead setting. Gipsy setting need a seat deep enough that the rondiste of the stone is 0.2 - 0.3 mm below the metal surfase. Bead setting is more flexible, the stone could also be flush with the metal surface.
I mounted 5 flex shafts (4 of them light and small like the Dremel flex shaft) onto DC motors with different max. speeds, which I control all with one foot pedal with selector switch. High speed (up to 20000 rpm) for the 0.5 mm drill, medium speed (max. 8000) for the small dental burr and for a cylindrical burr if I need one for row or pavé settings, and a really slow one (max. 1800) for finishing the seat. With this setup, I could leave the different tools in the flex shafts and just select the one I need. Clearly, the setup is much exaggerated for an attempt at stone setting. But I strongly advice a light flex shaft with a low speed motor and an accelerator pedal that allows precise control at low speeds. Always set down the burr or drill on the metal first, and start rotation slowly then. That avoids the “runaway tool”