Ink transfers

Barry Lee Hands

~ Elite 1000 Member ~
Joined
Feb 7, 2007
Messages
1,272
Location
Las Vegas
Perhaps this might be of interest to some. . . . .
I took some pics of some things I use in ink transfers, and the results.
Top center: I cut the main scroll and leaf lines in a ring, on the left is the ink, on the right a piece of cardstock, and at the bottom a tape pull of the ink I rubbed into the ring.

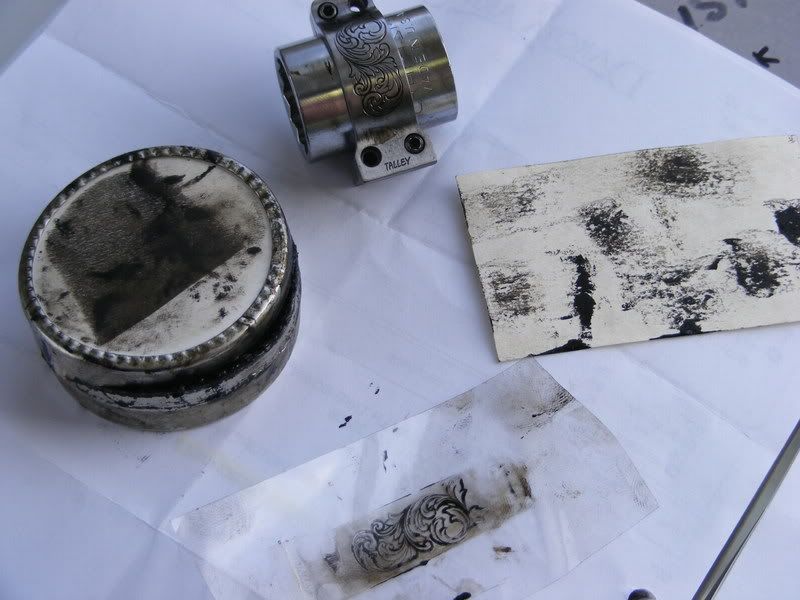
After I ink the original piece, I use the card to rub off the excess ink. I then apply clear packing tape, and burnish heavily, to lift the ink.

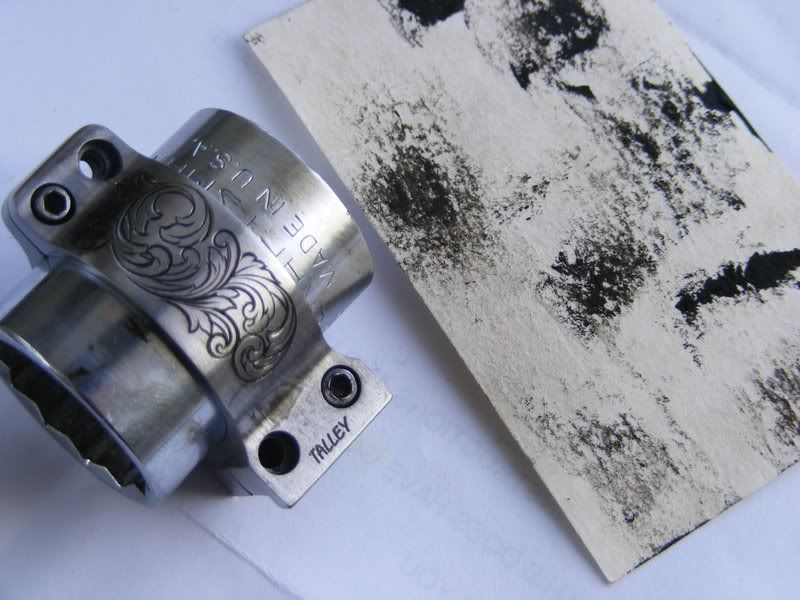
Then I pull the ink with the tape,

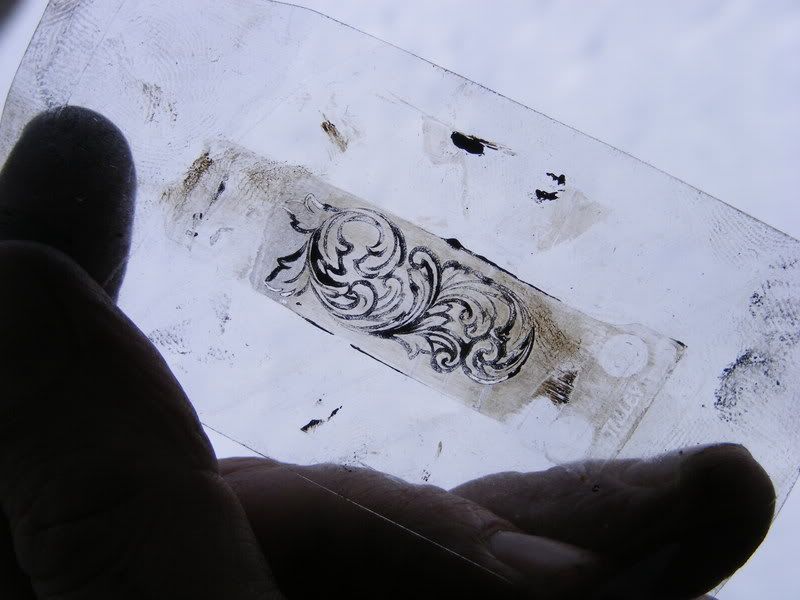
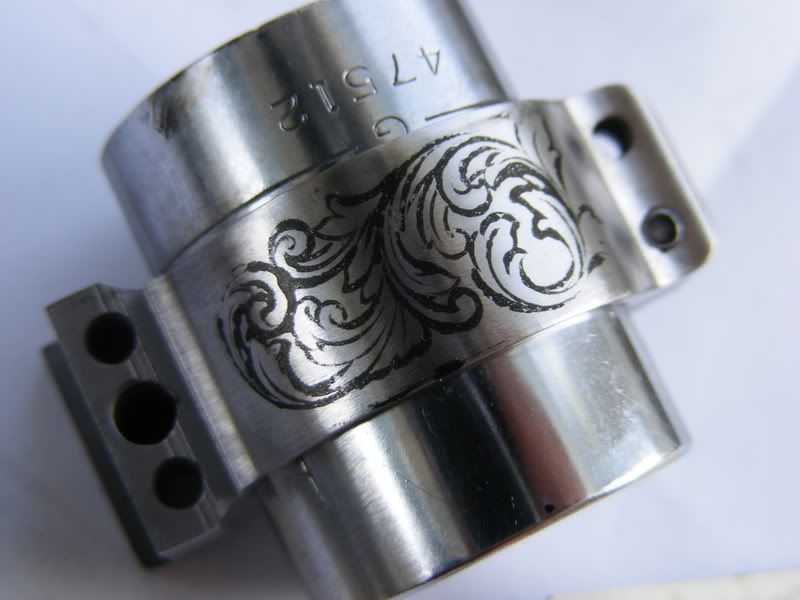
And place it on the next ring, and burnish lightly to transfer the ink,
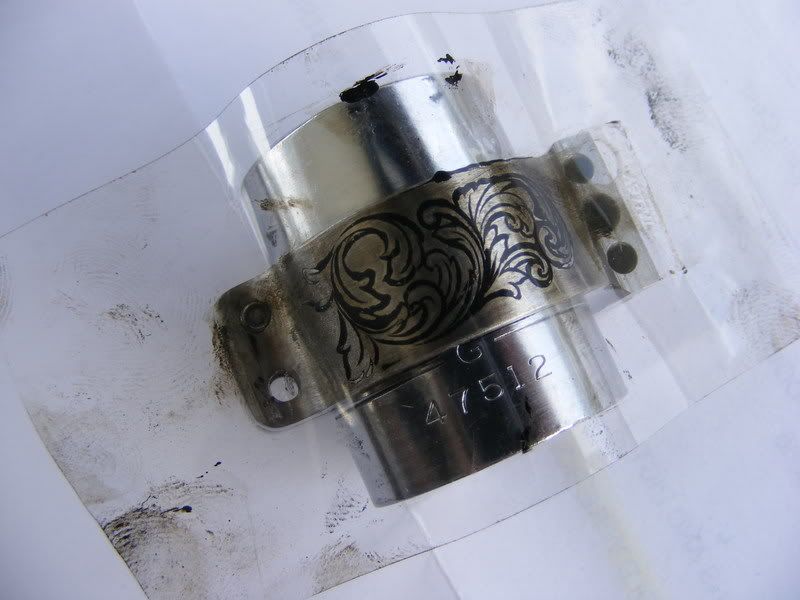
 

Sam

Chief Administrator & Benevolent Dictator
Staff member
Joined
Nov 6, 2006
Messages
10,491
Location
Covington, Louisiana
Nice transfer technique and photo series, Barry. I've added it to the Tips Archive.
Thanks for your contribution! / Sam
 

Ranchman

Elite Cafe Member
Joined
Jan 25, 2007
Messages
138
Location
Colorado
Thank you for showing that. I've heard of ink transfers but thought it would be a very messy thing to try.
Looks like the trick is removing the excess ink with the card stock.

Very nice work
Jeff
 

jimzim75

Elite Cafe Member
Joined
Nov 10, 2006
Messages
808
Location
Canada
Hi Berry,
Nice tutorial. I would think some sort of ink that is not water based would work. What do you use.
Possible an acrylic? Printers ink? Left over ink form printer cartidges?
Jim
 

Roger Bleile

~ Elite 1000 Member ~
Joined
Oct 4, 2007
Messages
2,990
Location
Northern Kentucky
Barry,

You inadvertantly taught another tip: Use a socket wrench in the ring so you can clamp the wrench in the vise instead of the ring.

Thanks,

Roger
 

Weldon47

~ Elite 1000 Member ~
Joined
Dec 9, 2006
Messages
1,412
Location
Welfare, Texas
Barry,
Thanks for sharing. I do the same technique but I pat the ink on with my finger (somewhat) evenly over the surface. Then I place tape on the design & lift the transfer off. I end up with a negative transfer instead of a positive. I dust the ink with talc to fix the design. I was shown this trick (fingerprint ink & tape) by my dad & I have used it since I started in '79.
By placing one piece of tape down with the sticky side up and transferring the design to it first, you can make a quick mirror image of the pattern (very, very useful as you know!) Somewhere along the way they (the ink manufacturers) must have changed the ink formula. Where before I could use the two pieces of tape and make a reverse, the ink will no longer transfer to the other piece of tape. Ron Smith mentioned a solution for this problem by mixing a little vaseline with the fingerprint ink and that was the fix!
Wondered if you had encountered this issue?

Weldon
 

pilkguns

~ Elite 1000 Member ~
Joined
Nov 14, 2006
Messages
1,874
Location
in the land of Scrolls,
Barry looks like Weldon beat me to the punch, but the description he gives is what I use and learned it from Frank Hendricks when I visited him in 1984. Frank told me to use fingerprint ink, or Prussian Blue, and the fingerprint ink I initially bought dried to fast, but the Prussian Blue, or Dykem Hi-Spot blue as it is available today still stays wet enough to transfer reverses. Or at least the last of it I bought which was 10 years ago or so....


Roger, I saw that socket too and said to myself...hmmm that's a good idea.
 

Roger Bleile

~ Elite 1000 Member ~
Joined
Oct 4, 2007
Messages
2,990
Location
Northern Kentucky
Weldon,

I use the two tape mirror image method you mention but with smoke. I have found that it is important to use 3M clear packing tape and not some off brand. I also found that you can't stick the two pieces of tape together then come back a week later and pull them apart without the glue peeling off the tape. For those who have not used smoke, you can't get a good transfer to bare metal. You must have the surface painted white or something the smoke (carbon) can stick to.

Roger
 

Barry Lee Hands

~ Elite 1000 Member ~
Joined
Feb 7, 2007
Messages
1,272
Location
Las Vegas
Tira,Printers ink is what I use, from graphiic chemical and ink., Thanks Andrew, its a sony 12 mp cam.
Sam I am happy to contribute.
Weldon, you can transfer to another piece of tape, and this stuff will stay wet for a long time with a little care, espescially if you submerge it in a baby food jar filled with water . . . .
And Roger I was wondering who would comment on the socket first. In that pic i am using a Craftsmen, of course on highbrow stuff you would want to use a snap on, hehe. . . .
 
Last edited:

John B.

Lifetime Pledge Member
::::Pledge Member::::
Joined
Nov 9, 2006
Messages
3,958
Location
Los Angeles area, California.
Thanks for posting the good pictures of this method, Barry. You do great tutorials and pictures.
Here is a slightly different way and additions for some to try.
A good ink for straight or reverse transfers is Speedball block Printing Ink, Black #3550, Oil base.
It is easy to buy and inexpensive at most art stores.
It comes in a nice, stand-up tube and if you keep the cap on it a tube will last a long time.
Apply the ink with a Q-Tip, use the edge of a discarded credit card to remove excess from the surface,
wipe clean with a tissue, apply tape and burnish lightly over the lines. Perfect image every time.
To make a reverse, as Weldon said, tape down both end of a piece of tape to the bench with the glue side up. Rub over the glue with a slightly oily finger to take a little of the grab away from the glue.
Keep hold of the end of your ink print but place the tapes face to face and lightly burnish with your finger.
This will transfer the reverse image to the bottom tape and you can print it to the engraving project.
Putting the ink images face to face between two tapes gives you a good way to keep and store your images.
You can also just stick the tape to a piece of transparency film for storage, records or printing
You can use these little windows to print from a copy machine or ink jet printer for future use also, and you can turn it over to print a reverse image
With a corner taped to your light or window they give you a study model of what you are cutting.
Make an ink lift and window after cutting the detail on the first side and it will remind you how you are shading repeated elements without having to turn the item over to see.
Just my thoughts, hope it helps some.

John B.
 

FANCYGUN

~ Elite 1000 Member ~
Joined
Nov 10, 2006
Messages
1,842
Location
West Grove, PA
You will find it helpful to dust the ink with taclum powder after you apply it to the metal. The talc dries the ink and helps prevent it from smeering.

Marty
 

Ozgraver

Member
Joined
Feb 3, 2008
Messages
77
Location
Australia
Nice tutorial, but nobody has mentioned the obvious; surely the 'wings' on the ring would make it very uncomfortable to wear. :rolleyes:
 

KCSteve

~ Elite 1000 Member ~
Joined
Jun 19, 2007
Messages
2,882
Location
Kansas City, MO
Apply the ink with a Q-Tip, use the edge of a discarded credit card to remove excess from the surface,

I keep all of the fake 'cards' I get in the mail for things like this.

Never know when you might need a plastic shim or something.

I also use them to make 'flat packs' of tape - for something wide like duct tape you wrap it around the long axis, for narrow stuff (like electrical tape in various colors) you go around the short way and get multiple 'rolls'.
 

Sponsors

Top