One question I have for advanced level of bulino is how does one achieve that truly photo realistic look. For example if you look for masters like firmo&francesca fracassi, Geoffrey lignon, etc it’s as if a black and white photo is set into steel.
Just thinking through the problem in my head its obviously due to an extreme level of skill and dedication but technique wise other than the density of dot spacing and depth of the dot spacing how else can the image be affected?
So far I have only used the Phil coggan bulino point and have gotten comfortable with it. Is it worth experimenting with another geometry to affect the image in some way or is the massive level of difference between my own work and master level down to the increasing the “resolution” of the dot spacing? I currently use a 6x Zeiss loupe and was thinking of stepping that up to a 10x to make that resolution jump “easier”. My only worry is the Zeiss 10x is super small area wise to view when compared to the very large 6x.
I have seen the Chris Decamillis bulino videos and took a bulino class online a while back with Wes Griffen. So I have seen to a very basic degree how graver geometry can affect the way light reflects in the more “line” base style of bulino. Is that concept similar to dots? Or are they too small to really matter? Also to leave the burr on the piece or cut the burr? (Thats a huge question I have!) I try to cut it away most of the time but inevitably some remain. I enjoy the picked dot way of doing things but never have seen a bulino engraved piece in person, photos never do it justice because they are too far away. so it’s hard to tell the scale of things and what techniques are used.
Does anyone know of a place maybe a museum or something where pieces can be seen in person ideally in the New England area? Tired casting plates but they only tell so much and at this scale I have trouble finding plates that show the really high level work.
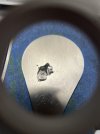
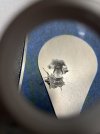
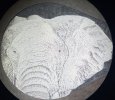
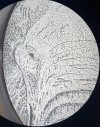
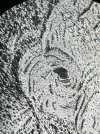
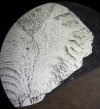
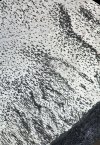
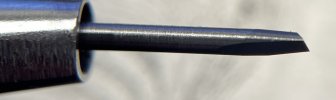
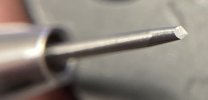
Thanks again, photos just for examples of my work super close up and of the tool I use. The shaft of the tool is 1/16
Only way to get better is the hard way I guess! back to the bench for me.
thanks again
-Mike
Just thinking through the problem in my head its obviously due to an extreme level of skill and dedication but technique wise other than the density of dot spacing and depth of the dot spacing how else can the image be affected?
So far I have only used the Phil coggan bulino point and have gotten comfortable with it. Is it worth experimenting with another geometry to affect the image in some way or is the massive level of difference between my own work and master level down to the increasing the “resolution” of the dot spacing? I currently use a 6x Zeiss loupe and was thinking of stepping that up to a 10x to make that resolution jump “easier”. My only worry is the Zeiss 10x is super small area wise to view when compared to the very large 6x.
I have seen the Chris Decamillis bulino videos and took a bulino class online a while back with Wes Griffen. So I have seen to a very basic degree how graver geometry can affect the way light reflects in the more “line” base style of bulino. Is that concept similar to dots? Or are they too small to really matter? Also to leave the burr on the piece or cut the burr? (Thats a huge question I have!) I try to cut it away most of the time but inevitably some remain. I enjoy the picked dot way of doing things but never have seen a bulino engraved piece in person, photos never do it justice because they are too far away. so it’s hard to tell the scale of things and what techniques are used.
Does anyone know of a place maybe a museum or something where pieces can be seen in person ideally in the New England area? Tired casting plates but they only tell so much and at this scale I have trouble finding plates that show the really high level work.
Thanks again, photos just for examples of my work super close up and of the tool I use. The shaft of the tool is 1/16
Only way to get better is the hard way I guess! back to the bench for me.
thanks again
-Mike
Attachments
-
 IMG_7013.jpeg272.4 KB · Views: 55
 -
 IMG_7015.jpeg272.6 KB · Views: 49
 -
 IMG_7019.jpeg302.8 KB · Views: 46
 -
 IMG_7017.jpeg232.2 KB · Views: 45
 -
 IMG_7018.jpeg301.7 KB · Views: 47
 -
 IMG_6926.jpeg31.6 KB · Views: 46
 -
 IMG_6927.jpeg51.8 KB · Views: 56
 -
 IMG_6997.jpeg126.9 KB · Views: 59