Hi, first time posting here and also generally new to engraving, so I hope I don’t make any egregious errors. I’m a goldsmith with ~6 years of practice at the bench, mostly in hand fabrication. I’ve taken 2 GRS classes for stone setting, and the second was taught by Todd Daniels, which incorporated some decorative engraving into the settings. We also learned some basic borders. At any rate, though my main goal is to get strong graver control skills for stone setting, I figured that practicing engraving some practice plates would also be a good way to practice making consistent cuts with the hand piece in a different way than I’m used to, which might also make practice fun & interesting.
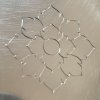
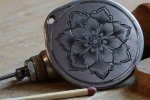
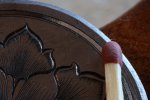
In that spirit, I cut my first large pattern (a practice transfer from the GRS class handouts) today using a 105° carbide graver, and I think the outline is ok (though I’d love feedback on that as well), but when it came time to shade it, I realized everything I’ve seen about shading was for scrollwork and not really this kind of flower pattern. So, how would you shade this? I’m also not certain that I was meant to point the tips of the small lobes on the lleaves/petals, but I wasn’t confident about doing that tight turn around the tip all in one stroke, but then I thought: would you break that into two rounded strokes or would it in fact be best to do the whole rounded tip in one cut? Finally, where the leaves join the central “button”, would you make one cut up to the tip and join in a second for the next leaf over like I did, or would you do two full cuts up to each leaf’s side?
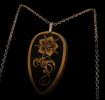
if anyone has a shaded & finished version of this pattern or something near to it, could you share a pic so I can see how you interpret this type of design?
Thanks for looking, and I do appreciate all feedback & constructive criticism!


