You are using an out of date browser. It may not display this or other websites correctly.
You should upgrade or use an alternative browser.
You should upgrade or use an alternative browser.
still kicking
- Thread starter Dani Girl
- Start date
Sinterklaas
Elite Cafe Member
You dont have to drill with large drills. I use 0,6mm drill for 1mm stones. And If the I prefer not to drill through the metal in case of jewelry. So it will stay stronger. What you can do to clean up the back is. With a slightly larger ball burr that the drill lightly make a facet on the hole. Dont go in to the metal. Just enough to remove the metal burrs on the back. You can even do it by hand. Just push and twist. Then the back will look clean.
Dont drill to large then you will have hardly any metal for the stone's seat.
For (micro)pave work I dont even use setting burrs. I only use ball burrs to make the seats. Drill small hole then use gradually larger ball burrs to get to the stone size.
To remove the metal between the holes you can use a cylinder burr or a tapered burr in a small diameter.
You could also use a small graver.
As for the burrs making a weird pattern in the hole. Try to push harder and see if that fixes it. Also check if all the facets on the burr are intact.
yes pushing with more pressure and going slower seem to help, but swapping to busch burs fixes
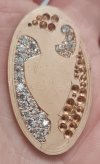
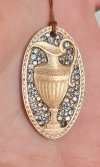
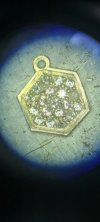
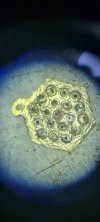
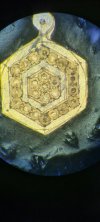
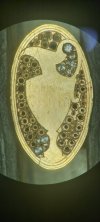 that mostly. I'm really struggling with the setting part. I'm not sure if I've cut/divided up the prongs in the right fashion. I see some superglue happening to this one too. lots of my holes are too deep. I think it will take a while to get a feel for perfect depth.
the section inside the handle I just decided to make as many prongs as possible and see if they can hold.
I'm pretty sure I'm doing this all wrong.
 that mostly. I'm really struggling with the setting part. I'm not sure if I've cut/divided up the prongs in the right fashion. I see some superglue happening to this one too. lots of my holes are too deep. I think it will take a while to get a feel for perfect depth.
 the section inside the handle I just decided to make as many prongs as possible and see if they can hold.
I'm pretty sure I'm doing this all wrong.
I got one side to stick apart from one broken stone. having a lot of trouble getting them to sit upright and also I've a feeling i shouldn't have split the beads like I did?
stone setting and work holding? grs black pitch cup? is it petrol or diesel to dissolve that? I imagine there would be lots of stones that wouldn't like being soaked in fuel. what about the red pitch jewellers use? how does one get that off? I don't fancy the idea of trying to pick thermoloc out of every nook and cranny and I recall a post from a decade or so ago of a jeweller who did and then tried everything to dissolve it out but nothing could.
rweigel
Elite Cafe Member
“having a lot of trouble getting them to sit upright” - I use the same type of tool holders as for beading tools and fix a piece of hard 2.5mm brass rod inside. I file it to a blunt point and use it to press down the stones into their holes. By pressing down at one side or another, I can change the orientation of the stone and align it. I use ball burs for the stone seat and drill them such that the stone fits tightly. The spherical shape of the seats gives the freedom to align the stones slightly. If one does not budge, I pull it put with the beeswax/charcoal cone and try to align it better next time. Works for Zirconia and Diamond, could be fatal for brittle stones.
I push the beads against the stones in several goes, as pushing to much one bead without the other three holding the stone already slightly will result in unwanted displacement.
Cheers
Ralf
I push the beads against the stones in several goes, as pushing to much one bead without the other three holding the stone already slightly will result in unwanted displacement.
Cheers
Ralf
Last edited:
I broke 3 stones trying to move them or not realising the beading tool was in contact. broke 3 drills and a blade off a ball bur. I decided it's nicer to oneself to clean out deformed metal formed when cutting the relieving cuts around the prongs out with a setting bur. thanks for that tip, I also put brass rod in my palm control and whacked the heck out of them asking them to move, I think maybe the off centre drill holes might have played a part. next time I'll start with the burs and maybe drill later. lots of these stones are way way too deep. it's not overly easy.
pitch cup for workholding?
pitch cup for workholding?
I found a 1.1mm bur is needed to be able to force 1mm stones in, does that sound right?
I felt like the beading tool was forming the beads into round shapes but not deforming the metal over the stones. perhaps I needed a larger beading tool? perhaps the stones needed to be deeper to allow enough metal to deform. I'll try again after I get out of the house and eat some cheesecake and coffee. if these weren't czs I might be crying over spilt milk right now. as it is, deep sigh... ughhh, hmmmmmmm... ok try again, later.
so far they're stuck. I had to go to the busch carbide round 1mm and bury it entirely. then there was just enough space to deform a shared bead. but the next one I'll make sure the holes fit the stones before I cut the border lines and I prefer pushing a flat down to cutting accross with the onglette or 90 degree as it doesn't deform metal into what was a nice round seat. Its nice to be trying something new.
does anyone know if rose golf or rhodium pen plating solution will work on bronze?
farmer57
Member
Not sure about rhodium but for gold plating on bronze, you might want to nickel plate it first - the results will be much better.so far they're stuck. I had to go to the busch carbide round 1mm and bury it entirely. then there was just enough space to deform a shared bead. but the next one I'll make sure the holes fit the stones before I cut the border lines and I prefer pushing a flat down to cutting accross with the onglette or 90 degree as it doesn't deform metal into what was a nice round seat. Its nice to be trying something new.
does anyone know if rose golf or rhodium pen plating solution will work on bronze?
Sinterklaas
Elite Cafe Member
You can use Superglue to hold parts. Glue to a piece of wood or metal. Heat after setting and pull of the work. Or place in Acetone.
You could use GRS thermolock. But if you burr a lot it will heat up and get soft again. Not ideal. Also can be a pain to remove.
I rather use polymorph plastic/thermoplastic. Easier to remove and cheaper than the GRS thermolock. But will also get soft again when it gets to warm.
I am currently using shellac to hold parts to (pave)set them. Dissolves in alcohol. But also gets soft when it gets to hot. But not as fast as the thermolock.
Sinterklaas
Elite Cafe Member
I see in some pictures. You have drilled way to big holes. Compared to your burr. There is hardly any metal left for the stones to sit on.
For depth burr to about 60% of the ball burr. For diamonds. For CZ and colored stones you probably have to burr a bit deeper. Because they have a thicker girdle. For smaller stones like you are using. Aim to get the table of the stone at or below the metal surface. That way you have enough height of the prongs to push over.
For beading tool you want a size that will fit over the entire bead. But not bigger. If you use a to big beading tool you will hit your stones before the bead is pushed all the way over.
When using the beader dont really push down. Push the prong towards the stone. Or between 2 stones when using a shared prong design.
I also see that before you put the stones in your prongs are not shaped right. That will also give you grief.
For split prongs you want a rectangle shape and for a shared a square shape. It doesn't have to be a perfect shape. But no triangle parts between the holes. That you need to remove.
For your brightcut what graver are you using?
I recommend a 60 degree. And tilt it a little away from the holes towards the outside.
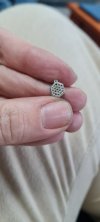
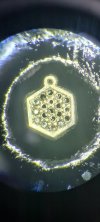
I've been trying both an onglette and a 90 degree v for the cutting around the stones. I see the onglette mostly in youtube stone setter videos, actually I'm not sure if I've ever seen anything else. For some reason I loathe cutting with the onglette but I'm giving it more of a go. I've also been trying the 90 degree v and I'd have to say I prefer the feel of using it and I have them well polished so the bright cuts actually look bright. Thankyou for the feedback Sinterklaas, I greatly appreciate it. Ok, so shared beads never actually get shared over three stones? It's hard to see in videos whether they are getting pushed straight down on to result in each bead covering three stones or if there is some pattern to the pushing the beads so that they are being pushed sideways to beads holding two stones at a time (pave shared prong setting). I'm not sure how to eliminate triangular posts to be beaded between stones in staggered setting like this (pic).


