You are using an out of date browser. It may not display this or other websites correctly.
You should upgrade or use an alternative browser.
You should upgrade or use an alternative browser.
still kicking
- Thread starter Dani Girl
- Start date
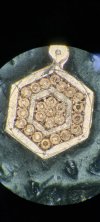
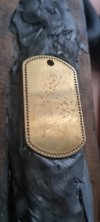
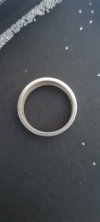
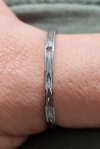
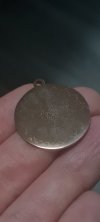
I did this extremely hard stainless ring a couple of days ago. I set the sapphire in. I broke 4 116 gravers trying to push beads up and over and severely mushed a beading tool, which I can repair. any pro tips for setting into hard metals? should one make ones own beading tools out of carbide with diamond ball burs? should one restrict oneself to certain methods of setting? carbide burs and drills seem a must. I was going to try setting this piece but I've surrendered to just engraving it as i started to drill it with a carbide busch pave bur and found it maybe even harder than that ring was. (gold plated stainless tags)


Sinterklaas
Elite Cafe Member
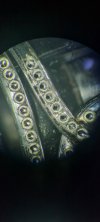
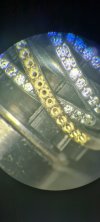
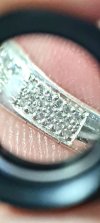
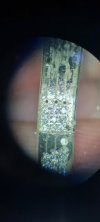
The 90 degree might be to wide and thus remove to much of the prongs. Use 60 degree gravers and tilt them a little away from the stone holes.I've been trying both an onglette and a 90 degree v for the cutting around the stones. I see the onglette mostly in youtube stone setter videos, actually I'm not sure if I've ever seen anything else. For some reason I loathe cutting with the onglette but I'm giving it more of a go. I've also been trying the 90 degree v and I'd have to say I prefer the feel of using it and I have them well polished so the bright cuts actually look bright. Thankyou for the feedback Sinterklaas, I greatly appreciate it. Ok, so shared beads never actually get shared over three stones? It's hard to see in videos whether they are getting pushed straight down on to result in each bead covering three stones or if there is some pattern to the pushing the beads so that they are being pushed sideways to beads holding two stones at a time (pave shared prong setting). I'm not sure how to eliminate triangular posts to be beaded between stones in staggered setting like this (pic).
In some cases 1 prong is shared between 3 stones. Like in your design 1 center and 6 around. Then the prongs around the center are shared between 3 stone.
If you do shared between 2 stones you can first push the prong a little sideways. Pushing towards the 2 stones. You can use a splitter or a flatgraver. Then use a beading tool to shape the prong and push the last bit over the 2 stones.
-------------------------------
For the stainless rings I would not use such wide gravers. Then you have to push a lot of metal. Use 90 or 60 degree.
For hard metals you are correct use carbide drills and burrs.
But I think you can still use normal steel beading tools. If mine get mushed it is mostly because they hit a stone.
You can indeed make your own from carbide. But it will increase the risk of damaging stones. Diamond will probably be safe. Although I even manage to break them sometimes using normal tools. Other stones you have to be more careful.
You could also try to do a gypsy/rub-over setting in the harder metals. Then you burnish metal over the stones. And dont have to cut and push prongs.
Are you using handpush gravers? Or power assisted gravers?
I would suggest practicing on softer metals first. I find that phosphor bronze is a very nice metal to practice in. It is not to hard and it is also much more forgiving than silver or copper. With silver or copper prongs might snap off if you make a mistake. Where as the phosphor bronze is more like gold. I highly recommend it for practice.
ok. might make some 60 degree v gravers. I'm using a Lindsay palm control and artisan with the foot control. I'm finding the foot control better for soft metals and extremely fine work as it allows you to use it as a hand push graver without assisting unless you ask it to.
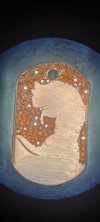
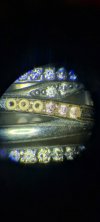
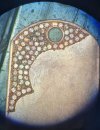
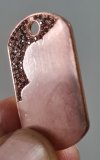
I thought I'd try a more organic layout on this one but I think next time I'll just go with machine like pave precision and put up with where stones don't fit at edges... I used the closest colour stones I could find to the metal which I expect I will rose gold plate, it looks better under the scope than to the naked eye.
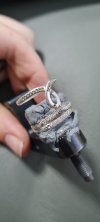
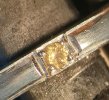
set a 1mm sapphire into this silver ring today. went ok, challenging. not perfect. not quite sure what to do to get from this to perfect. smaller beads?
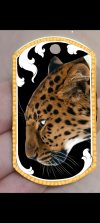
for the stainless gold plated leopard tag, would i have to nickel plate before 24k gold plate? curious to see what plating over egraving looks like especially as the cuts show through to the silver and it looks a bit odd.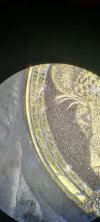



Raudt89
Member
- Joined
- Mar 27, 2021
- Messages
- 46
Hello Dani, Good job there, congratulations, I think I've seen that you use a Lindsay handpiece. Lowering the PSI will only give you more range on the pedal, but you can still make very deep cuts with a low PSI, the important thing is the length of the stroke. If you want to go slowly or you are cutting in soft metals use a short stroke, as short as you feel comfortable, in some areas I usually configure the stroke almost to the minimum to cut in steel, it depends on how slow I want to go and how intricate the engraving. To eliminate the background in very closed areas I use flat gravers of 0.15mm and 0.2mm thickness, 60° face and 20° heel, if it is buried it is because you must increase the size of the heel. In 24k gold the graver is buried as if it had no heel, a larger heel creates more resistance, but you must find the perfect size according to the size of the engraving you are making, because you can also damage the engraving with the back of the heel. You can also use a narrower graver, maybe a 105° to remove the metal that is closer to the contour cuts and then use the plane to remove the background with less risk of damage. You can also use a rotary motor with burs made by you for very small areas.I was fairly pleased with my 116 v graver work... but when I pulled out the flat to cut the background flat I was running into scrollwork with the belly of the graver and it really wanted to dive all the way to China and not just knock the tips off of where I'd gone to and fro in the background with the v. higher heel? different face angle? different pressure or piston or...??? what am I doing wrong when a graver just wants to dive? how do I not mess up my initial outlines when backgrounding? ta
Raudt89
Member
- Joined
- Mar 27, 2021
- Messages
- 46
There is no trick as far as I know, just a light handI've found it easier in this larger ring made of stainless to not dive to China with the flat and to not marr the scrolls. I really struggle in soft metals. are there any tricks? View attachment 53209
Raudt89
Member
- Joined
- Mar 27, 2021
- Messages
- 46
You don't need to sacrifice any, using a negative relief you get the same result without the graver losing its usefulness, it will even work very well with the carbide ones.You can also 'sacrifice' one or two (or more) gravers and grind out an area immediately behind face/heel. I use this a lot when voiding tiny areas to be enamelled (where deeper voiding is needed). Easy to do with round diamond burr - you can grind 'back' as far as you need to not risk running into your outlines. I leave about 1-2mm of original graver profile so there is some room to re-sharpen. HSS gravers seem to not break as often as carbide. Hope this helps.
Sinterklaas
Elite Cafe Member
No idea if you need to nickel plate stainless first.
The prongs on the saphire ring look like a good size. They are probably the size I would make them. Smaller would also mean weaker and they will also wear out faster. The 2 on the left look the best. Top right a bit to small. It seams it doesn't go over the stone very much. You want the beads to be atleas over the first crown facets.
The prongs on the saphire ring look like a good size. They are probably the size I would make them. Smaller would also mean weaker and they will also wear out faster. The 2 on the left look the best. Top right a bit to small. It seams it doesn't go over the stone very much. You want the beads to be atleas over the first crown facets.
I can agree there, they weren't over the stone far enough she fell out as I engraved the ring. inserted another and pushed them further over the stoneNo idea if you need to nickel plate stainless first.
The prongs on the saphire ring look like a good size. They are probably the size I would make them. Smaller would also mean weaker and they will also wear out faster. The 2 on the left look the best. Top right a bit to small. It seams it doesn't go over the stone very much. You want the beads to be atleas over the first crown facets.
Love the cat !
I've been told I'll need an ultrasonic too to clean polishing compound away before plating, using nickel for sure on coloured metals like copper but I believe it's also recommended with silver to prevent merging but you can do without too. I think.
does anyone know or want to sell an ultrasonic that would be pretty cheap but still powerful enough to do good work? I'm in Australia 220-240v needed.
does anyone know or want to sell an ultrasonic that would be pretty cheap but still powerful enough to do good work? I'm in Australia 220-240v needed.
Raudt89
Member
- Joined
- Mar 27, 2021
- Messages
- 46
How about Amazon, I bought one there with very good reviews and it work excellent, cost 40usd + taxI've been told I'll need an ultrasonic too to clean polishing compound away before plating, using nickel for sure on coloured metals like copper but I believe it's also recommended with silver to prevent merging but you can do without too. I think.
does anyone know or want to sell an ultrasonic that would be pretty cheap but still powerful enough to do good work? I'm in Australia 220-240v needed.
it's a very fine tolerance game in getting the metal that will form beads to be just the right size, the holes just the tight depth, just enough shaved off the side of the prongs and the perfect choice of beading tool size so that you actually get bead over stone and no flashing or ugly. I'm feeling like my improvement alone is going to slow some from here in. I'm breaking less, swearing less, dropping some, getting most mostly upright, but it's not pretty yet.
If one wants to set a background like I did that cat, one definitely needs at least 3, better yet 4 or 5 different sizes of stones. I wander if there is a software that you can draw a shape into and it could arrange the optimal array of dots for placement. it looks better with as little metal showing as possible
If one wants to set a background like I did that cat, one definitely needs at least 3, better yet 4 or 5 different sizes of stones. I wander if there is a software that you can draw a shape into and it could arrange the optimal array of dots for placement. it looks better with as little metal showing as possible
it's been a pretty expensive venture, the stone setting gear and stones and plating solutions are very expensive. inlay will always be better and you need to plan to do a fair bit to justify the costs.
any pointers on getting better?
any pointers on getting better?
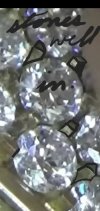
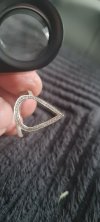
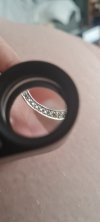
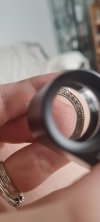
staggered and side by side pave, lines of stones with shared beads and with split beads. how do I get better? I wanna get to master gemsetter level but can't afford classes. can anyone spot anything specific I could do better (besides everything)?


