rweigel
Elite Cafe Member
As promised, now for the downloaded videos:
iPad
practice pdf is found in the player, under media
Windows
practice pdf is found at the bottom of the chapter list
strange enough, the chapter list is located in a window titled „Alfano art monogram...“
It also tells me there are more movies to download, but if I enable it, it does not download a thing
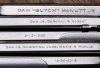
So everything works, I‘m happy, the first practice plate with straight lines is cut. Navigating the graver with this kind of roll and getting the roll symmetrical will take more practice plates...
Best regards,
Ralf
iPad
practice pdf is found in the player, under media
Windows
practice pdf is found at the bottom of the chapter list
strange enough, the chapter list is located in a window titled „Alfano art monogram...“
It also tells me there are more movies to download, but if I enable it, it does not download a thing
So everything works, I‘m happy, the first practice plate with straight lines is cut. Navigating the graver with this kind of roll and getting the roll symmetrical will take more practice plates...
Best regards,
Ralf
")